You knew I wasn't done with that duck. I think I used everything but the quack!
Thai curries are a huge favorite of mine, and I decided to create my own. If you haven't a duck, you could substitute chicken or shrimp.
A friend, recently returned from Thailand, said she loved the food, but after a while it all started to taste the same. We have Thai food only occasionally, so always love its distinctive coconut/spicy/ginger/lime flavors.
In this curry, the pineapple provides a zingy sweetness, and the shiitakes and duck are good, earthy complements for each other.
____________________________________________
THAI DUCK CURRY WITH SHIITAKES AND PINEAPPLE
I HIGHLY recommend getting everything chopped and ready to go before you start cooking. This dish goes together quickly. I actually prepared the vegetables and pineapple the night before.
1 tablespoon coconut oil
1 red onion, chopped
1 red pepper, diced
1 cup diced cabbage
1 tablespoon fresh ginger, minced
2 cloves garlic, minced
1 tablespoon Thai red curry paste
1 tablespoon Thai green curry paste
1 14-ounce can coconut milk, plus one small can coconut cream or coconut milk
1-1/2 cups duck stock (you can use chicken stock)
1 tablespoon almond butter (you can use peanut butter)
1 cup diced fresh pineapple
2 kaffir lime leaves
2 cups duck meat, sliced from roast duck
15 shiitake mushrooms, stemmed and halved
1/2 cup whole raw cashews
1/4 cup Thai fish sauce
1 tablespoon lime juice
1/2 cup sliced basil
1/2 cup chopped cilantro
Heat coconut oil in a large skillet over medium-high heat. Toss in the onion, pepper, cabbage, ginger and garlic, stir-frying 'til everything has a glossy sheen and has started to soften, about 5 minutes.
Add curry pastes, using caution with amounts. Curry pastes vary wildly in heat strength. Stir and fry so that the pastes are distributed throughout.
Add coconut milk, duck or chicken stock, almond butter, pineapple and lime leaf and stir well. Bring all to a simmer and cook for 10 minutes.
Stir in duck meat, mushrooms and cashews, and cook for 5 minutes more.
Stir in fish sauce, lime juice, basil and cilantro, and return to simmer. Serve with braising greens and rice, if desired. Warn people to watch out for the lime leaves! Their flavor will deepen in the curry if they are left in, which is one reason not to remove them.
Makes 4 to 6 servings.
Saturday, February 26, 2011
Thursday, February 24, 2011
Pear and Cardamom Breakfast Cookies
A batch of these grain-free delights is easy to make and keep in the fridge, and the cookies are a welcome sight on mornings when you don't feel like spending a lot of time cooking breakfast. The original recipe called for apple, but my lovely red CSA pears inspired me to try them instead.
Of course, there are many variations and options with fruit and spices for this cookie. As well, you can leave the fruit in dice and stir it in just before baking, for a fruit-studded cookie, or blend the fruit in for a smoother, sleeker cookie.
________________________________________________.
PEAR AND CARDAMOM BREAKFAST COOKIES
Adapted from This Primal Life
If you use use very large pears or apples, ultimately you'll have more liquid and thus a runnier batter. You want the batter to hold a cookie shape. If your fruit is very large, considering using half of it, or doubling the recipe.
1 cup almonds
3 dates (optional; the fruit makes the cookies nicely sweet)
Scant 1/4 teaspoon salt
1/4 teaspoon baking soda
1/2 teaspoon ground cardamom
2 tablespoons butter, ghee or oil
1 smallish CSA red pear, peeled, cored and diced
1/2 teaspoon vanilla extract
1 egg
Heat oven to 350 degrees.
Melt butter in small skillet, and cook the pear, stirring occasionally, until it is heated through and no longer crisp. It can still be firm. Remove from heat.
In food processor, process almonds and optional dates until a fine meal forms. Add salt, baking soda and cardamom, and pulse a few times.
Add eggs, vanilla, and pears, including any butter from the skillet, to food processor and pulse just until well mixed. Alternatively, transfer batter to a bowl and then stir in the pear chunks and liquid.
Drop by large spoonfuls on Silpat-lined baking sheet. Bake for 12 to 15 minutes, or until browned and firm. Remove to wire racks to cool.
Makes 4 large cookies (which is why I usually double the recipe! They keep well in the fridge.)
Of course, there are many variations and options with fruit and spices for this cookie. As well, you can leave the fruit in dice and stir it in just before baking, for a fruit-studded cookie, or blend the fruit in for a smoother, sleeker cookie.
________________________________________________.
PEAR AND CARDAMOM BREAKFAST COOKIES
Adapted from This Primal Life
If you use use very large pears or apples, ultimately you'll have more liquid and thus a runnier batter. You want the batter to hold a cookie shape. If your fruit is very large, considering using half of it, or doubling the recipe.
1 cup almonds
3 dates (optional; the fruit makes the cookies nicely sweet)
Scant 1/4 teaspoon salt
1/4 teaspoon baking soda
1/2 teaspoon ground cardamom
2 tablespoons butter, ghee or oil
1 smallish CSA red pear, peeled, cored and diced
1/2 teaspoon vanilla extract
1 egg
Heat oven to 350 degrees.
Melt butter in small skillet, and cook the pear, stirring occasionally, until it is heated through and no longer crisp. It can still be firm. Remove from heat.
In food processor, process almonds and optional dates until a fine meal forms. Add salt, baking soda and cardamom, and pulse a few times.
Add eggs, vanilla, and pears, including any butter from the skillet, to food processor and pulse just until well mixed. Alternatively, transfer batter to a bowl and then stir in the pear chunks and liquid.
Drop by large spoonfuls on Silpat-lined baking sheet. Bake for 12 to 15 minutes, or until browned and firm. Remove to wire racks to cool.
Makes 4 large cookies (which is why I usually double the recipe! They keep well in the fridge.)
Tuesday, February 22, 2011
The Delights of Mason Jars
Over on the smart palate, Nancy commented, "And why is it so much fun to drink out of a Mason jar?" The question niggled at me enough that finally I decided to address it. I'm always fascinated by trying to figure out why we do what we do.
As with those creepy dessert shooters, I found some strong feelings emerging about Mason jars. But unlike the icky shooters, most of my Mason jar feelings were positive. I had fun using a Mason jar for a few days to see what observations I could make about this humble object.
Drinking out of a Mason jar is fun because ... it seems slightly forbidden! It's a natural response to conventional wisdom's hoity toity "One does not drink out of a jar!" with a kind of triumphant, in-your-face, oppositional "Why the heck NOT, dude!" attitude. There's a little renegade in all of us, no?
Mason jars evoke, at least for certain people of my generation, security and plenty. We see cellar shelves filled with Mason jars of cherries, tomatoes, relishes, plums, peaches, pears ... as long as you have a tool to open your jars with, you'll have food, even in a national disaster. My great aunt used to send home jars of canned venison for us (I confess to always feeling a bit squeamish about it, though). So just looking at Mason jars, and handling them, brings back all those feelings. When was the last time a mere drinking glass actually evoked something for you?
Clearly, big business has discovered that Mason jars have draw power. I've long noticed that homestyle restaurants serve beverages in them. You can even buy faux Mason jar mugs with handles on them, presumably to fill this blatant need of restaurants and marketers to grab hold of our heartstrings and thus our pocketbooks.
I was stunned to discover a veritable plethora of restaurants in all corners of America calling themselves Mason Jar, even one in (gasp!) Manhattan. Is it just me, or is there something slightly sinister about using such a homey object to lure us in to consume what are no doubt the farthest things (in terms of quality ingredients and affectionate care in preparation) from homestyle dishes imaginable?
As with those creepy dessert shooters, I found some strong feelings emerging about Mason jars. But unlike the icky shooters, most of my Mason jar feelings were positive. I had fun using a Mason jar for a few days to see what observations I could make about this humble object.
Drinking out of a Mason jar is fun because ... it seems slightly forbidden! It's a natural response to conventional wisdom's hoity toity "One does not drink out of a jar!" with a kind of triumphant, in-your-face, oppositional "Why the heck NOT, dude!" attitude. There's a little renegade in all of us, no?
Mason jars evoke, at least for certain people of my generation, security and plenty. We see cellar shelves filled with Mason jars of cherries, tomatoes, relishes, plums, peaches, pears ... as long as you have a tool to open your jars with, you'll have food, even in a national disaster. My great aunt used to send home jars of canned venison for us (I confess to always feeling a bit squeamish about it, though). So just looking at Mason jars, and handling them, brings back all those feelings. When was the last time a mere drinking glass actually evoked something for you?
Clearly, big business has discovered that Mason jars have draw power. I've long noticed that homestyle restaurants serve beverages in them. You can even buy faux Mason jar mugs with handles on them, presumably to fill this blatant need of restaurants and marketers to grab hold of our heartstrings and thus our pocketbooks.
I was stunned to discover a veritable plethora of restaurants in all corners of America calling themselves Mason Jar, even one in (gasp!) Manhattan. Is it just me, or is there something slightly sinister about using such a homey object to lure us in to consume what are no doubt the farthest things (in terms of quality ingredients and affectionate care in preparation) from homestyle dishes imaginable?
Sunday, February 20, 2011
Pommes de Terre en Graisse de Canard
It came to my attention that the French use their duck fat to create gloriously crisp and flavorful fried potatoes. Why could I not do the same? We're eating few potatoes nowadays, but in keeping with our "small portions of really good food" theory, it seemed only right to use my local duck fat to fry some of my CSA potatoes. And they were, indeed, really good!
Besides, I've always wanted to write a recipe with the name translated in italics underneath it. Merci, Babelfish!
_____________________________________________________
LOCAL POTATOES FRIED IN LOCAL DUCK FAT
Les pommes de terre locales ont fait frire en graisse locale de canard
5 small CSA potatoes
2 tablespoons duck fat
Salt and pepper to taste
Peel potatoes, halve them lengthwise, then cut into 1/4-inch slices. I spread the potato slices out on a large plate and microwaved them for five minutes to get the cooking process started. My experience with frying raw potatoes has been that they take a very long time to fry to doneness. Ideally, I like to use oven-roasted potatoes, peeled and sliced, for fried potatoes, but I didn't have time for that.
Heat duck fat in a large skillet over medium heat. When fat is hot, place potato slices in the skillet, spreading them out as evenly as possible. Apply salt and pepper. Now go away for a while and don't touch the potatoes. They need a full five minutes or more to get a crispy finish. Carefully lift a slice or two and check for a golden, crispiness. If it's there, turn the potatoes in the skillet. Let them fry another five minutes or so, turn again if necessary to crisp most of the potatoes, and serve hot.
I could have let my potatoes fry a bit longer. It's enormously tempting to keep turning them, but they need uninterrupted frying time to get the best crispy effect!
Makes 6 abstemious servings
Besides, I've always wanted to write a recipe with the name translated in italics underneath it. Merci, Babelfish!
_____________________________________________________
LOCAL POTATOES FRIED IN LOCAL DUCK FAT
Les pommes de terre locales ont fait frire en graisse locale de canard
5 small CSA potatoes
2 tablespoons duck fat
Salt and pepper to taste
Peel potatoes, halve them lengthwise, then cut into 1/4-inch slices. I spread the potato slices out on a large plate and microwaved them for five minutes to get the cooking process started. My experience with frying raw potatoes has been that they take a very long time to fry to doneness. Ideally, I like to use oven-roasted potatoes, peeled and sliced, for fried potatoes, but I didn't have time for that.
Heat duck fat in a large skillet over medium heat. When fat is hot, place potato slices in the skillet, spreading them out as evenly as possible. Apply salt and pepper. Now go away for a while and don't touch the potatoes. They need a full five minutes or more to get a crispy finish. Carefully lift a slice or two and check for a golden, crispiness. If it's there, turn the potatoes in the skillet. Let them fry another five minutes or so, turn again if necessary to crisp most of the potatoes, and serve hot.
I could have let my potatoes fry a bit longer. It's enormously tempting to keep turning them, but they need uninterrupted frying time to get the best crispy effect!
Makes 6 abstemious servings
Friday, February 18, 2011
Classic CSA Braising Greens, Three Ways
By way of the wee memory fairy working her magic on two CSA customers this week, I found myself, as the drop site host, in possession of TWO unclaimed CSA boxes. I feel bad when people forget to pick up their boxes, but there it is. I have been instructed that the unclaimed boxes are mine to use or share.
This week we each had a bag of braising greens, so I have two extra bags ... a real treat, as I have never seen braising greens in the grocery store. The farmer's e-mail tells us the greens are all Asian varieties: mizuna, tatsoi, and mibuna. These greens wilt down significantly when cooked, like spinach. So I like to mix other vegetables (preferably from the CSA box!) in with them. This week's bok choy and red onion were perfect candidates!
There are, of course, infinitely more than three ways to cook greens. I have given ideas here. Think of them as the starting point for your own creations. The photo shows the Indian Braise.
____________________________________________________
CLASSIC CSA BRAISING GREENS, THREE WAYS
I suspect braising greens might be available in Asian markets, of which we have several in our area. But if you can't find them, spinach, chard and even sturdy lettuce varieties will work. Just watch the cooking times so you don't overcook thinner greens.
Indian Braise
1 tablespoon coconut or vegetable oil
1 baby bok choy, sliced
1/2 large or 1 small red onion, halved and sliced
2 cups sliced cabbage
1 tablespoon curry powder or garam masala
12 ounces or so mixed braising greens, sorted and washed
1/2 cup coconut milk
1/2 teaspoon red curry paste or 1/4 teaspoon crushed red pepper
Salt to taste
Coconut and chopped macadamia nuts to garnish (optional)
Heat vegetable oil in large-ish skillet. Add bok choy, onion and cabbage. Saute, stirring frequently, for about 5 minutes or until vegetables begin to soften.
Scatter curry powder and 1/4 teaspoon salt atop vegetables, stir, and cook, stirring for a minute or so until the spices become fragrant. Stir in coconut milk and curry paste, mixing well.
Pile braising greens into the pan, stir well to incorporate them with the other vegetables, and cover. Simmer for 10 to 15 minutes, stirring occasionally and adding water if necessary, until greens have wilted and become somewhat tender. Sprinkle coconut and chopped macadamia nuts atop if desired.
Makes two large or four small servings.
Oriental Braise
To same (or different!) combination of vegetables above, add chopped ginger and garlic when sauteeing the bok choy, onion and cabbage. Use sesame oil if desired. When adding the braising greens, stir in hoisin sauce or soy sauce mixed with a little water. Add crushed red pepper if desired. Garnish with toasted sesame seeds.
American Braise
To same (or different!) combination of vegetables above, using coconut oil or vegetable oil, saute with plenty of garlic. Stir in raisins, dried cranberries or chopped prunes when you add the braising greens. Just before serving, stir in a splash of lemon juice or balsamic vinegar, and some fresh walnuts. Orange peel and orange juice work well with this combination, too.
This week we each had a bag of braising greens, so I have two extra bags ... a real treat, as I have never seen braising greens in the grocery store. The farmer's e-mail tells us the greens are all Asian varieties: mizuna, tatsoi, and mibuna. These greens wilt down significantly when cooked, like spinach. So I like to mix other vegetables (preferably from the CSA box!) in with them. This week's bok choy and red onion were perfect candidates!
There are, of course, infinitely more than three ways to cook greens. I have given ideas here. Think of them as the starting point for your own creations. The photo shows the Indian Braise.
____________________________________________________
CLASSIC CSA BRAISING GREENS, THREE WAYS
I suspect braising greens might be available in Asian markets, of which we have several in our area. But if you can't find them, spinach, chard and even sturdy lettuce varieties will work. Just watch the cooking times so you don't overcook thinner greens.
Indian Braise
1 tablespoon coconut or vegetable oil
1 baby bok choy, sliced
1/2 large or 1 small red onion, halved and sliced
2 cups sliced cabbage
1 tablespoon curry powder or garam masala
12 ounces or so mixed braising greens, sorted and washed
1/2 cup coconut milk
1/2 teaspoon red curry paste or 1/4 teaspoon crushed red pepper
Salt to taste
Coconut and chopped macadamia nuts to garnish (optional)
Heat vegetable oil in large-ish skillet. Add bok choy, onion and cabbage. Saute, stirring frequently, for about 5 minutes or until vegetables begin to soften.
Scatter curry powder and 1/4 teaspoon salt atop vegetables, stir, and cook, stirring for a minute or so until the spices become fragrant. Stir in coconut milk and curry paste, mixing well.
Pile braising greens into the pan, stir well to incorporate them with the other vegetables, and cover. Simmer for 10 to 15 minutes, stirring occasionally and adding water if necessary, until greens have wilted and become somewhat tender. Sprinkle coconut and chopped macadamia nuts atop if desired.
Makes two large or four small servings.
Oriental Braise
To same (or different!) combination of vegetables above, add chopped ginger and garlic when sauteeing the bok choy, onion and cabbage. Use sesame oil if desired. When adding the braising greens, stir in hoisin sauce or soy sauce mixed with a little water. Add crushed red pepper if desired. Garnish with toasted sesame seeds.
American Braise
To same (or different!) combination of vegetables above, using coconut oil or vegetable oil, saute with plenty of garlic. Stir in raisins, dried cranberries or chopped prunes when you add the braising greens. Just before serving, stir in a splash of lemon juice or balsamic vinegar, and some fresh walnuts. Orange peel and orange juice work well with this combination, too.
Tuesday, February 15, 2011
Box Seven
I love it when I forget the boxes are coming, and drive up to my house and see them sitting there! This box reminds me of the one last year with six GIANT red onions. I was so thrilled that I made this recipe that called for three of them! We also have apples, squash, bok choy, sage, lavender, and braising greens. Dinner is gonna be great!
Friday, February 11, 2011
Roast Local Duck
Last November, I picked up my turkey from Russ and Laurie at CG Ranch in Benton City. It was really cold that darkening afternoon. Later that night, the first snow of the year would blanket the land. My friend Michele, several other customers and I were standing around waiting as the turkeys were weighed. Russ's coveralls were bloodstained from dealing with the turkeys.
Then Russ said, "I have extra ducks if anyone wants one." Instantly, I knew I had to have a duck. Visions of a crispy, roasted duck floated before my eyes. I had never cooked a duck, but in that visceral, rural, meaty moment, inexperience didn't seem any sort of obstacle. A duck wasn't just meat, it was game meat, something our pioneer ancestors, nay, even primitive man had pursued, slain, roasted over smoky fires, and been nourished by! (Yes, I know Russ raised the duck, but still. Ducks have history!)
And so the duck, wrapped and tucked in the freezer through Thanksgiving, Christmas, and beyond, was never far from my mind. I Googled. I read cookbooks. I talked to people about ducks. It seemed that ducks were regarded as problematic. They have lots of fat. They should be massaged for quite some time before cooking to soften the fat. They should be poached before roasting. They should never be poached before roasting! They should be trussed. They should be split. The wings should be removed. The wings should be left on and tucked.
A few days ago, I put the duck in the fridge to thaw, and it did. I now had no choice but to Take Action. I found the recipe I thought would see me though, and it did, splendidly. We enjoyed a luscious duck dinner tonight, and with less work than I had feared.
As I write this, I have about two cups of boned duck meat waiting to be made into a curry, about two quarts of luscious, savory duck stock, and a cup and a half of beautiful, golden, rendered duck fat.
All my duck dreams came true, and I am now a duck fan. I hope you will be, too.
_____________________________________________
ROAST LOCAL DUCK
I am indebted to the blog The Hungry Mouse for the excellent instructions and photographs. I followed the instructions except for the following adaptations:
Rather than scoring the duck's fat, I snipped it in a crosshatch pattern with the tips of kitchen shears. I cut the wings off, and laid them beside the duck on a rack in a shallow roasting pan. I salted the duck inside and out, rubbing the salt in. I did not tie the legs.
My duck was 3.5 pounds, and I was worried about over-roasting, given the recipe's four-hour roasting time for a larger duck. So I raised the oven temperature to 325 degrees. The duck roasted in exactly two hours, and I turned it over once after the first hour. At the two-hour mark, I tested the internal temperature in a thick part of the meat, and it was 165. I removed the duck to a small, shallow casserole, basted it with the sauce, and returned it to the oven for just about 10 minutes at 400 degrees. Shiny, fragrant, crackly, perfection.
My sauce adaptation included smaller amounts for the smaller duck:
1/4 cup molasses
2 tablespoons orange juice
1/4 teaspoon Thai red curry paste
1/4 teaspoon salt
A 1-inch knob of ginger, minced
Grated rind of one organic orange
Combine all ingredients in a small pan and simmer over low heat until reduced to a syrupy state.
The 3.5-pound duck served two people with nice sliced pieces, and the two drumsticks would probably constitute another serving. There are also the smaller pieces of meat taken from the bones later.
Here is my lovely duck fat! Apparently, it is the French secret to glorious fried potatoes.
Then Russ said, "I have extra ducks if anyone wants one." Instantly, I knew I had to have a duck. Visions of a crispy, roasted duck floated before my eyes. I had never cooked a duck, but in that visceral, rural, meaty moment, inexperience didn't seem any sort of obstacle. A duck wasn't just meat, it was game meat, something our pioneer ancestors, nay, even primitive man had pursued, slain, roasted over smoky fires, and been nourished by! (Yes, I know Russ raised the duck, but still. Ducks have history!)
And so the duck, wrapped and tucked in the freezer through Thanksgiving, Christmas, and beyond, was never far from my mind. I Googled. I read cookbooks. I talked to people about ducks. It seemed that ducks were regarded as problematic. They have lots of fat. They should be massaged for quite some time before cooking to soften the fat. They should be poached before roasting. They should never be poached before roasting! They should be trussed. They should be split. The wings should be removed. The wings should be left on and tucked.
A few days ago, I put the duck in the fridge to thaw, and it did. I now had no choice but to Take Action. I found the recipe I thought would see me though, and it did, splendidly. We enjoyed a luscious duck dinner tonight, and with less work than I had feared.
As I write this, I have about two cups of boned duck meat waiting to be made into a curry, about two quarts of luscious, savory duck stock, and a cup and a half of beautiful, golden, rendered duck fat.
All my duck dreams came true, and I am now a duck fan. I hope you will be, too.
_____________________________________________
ROAST LOCAL DUCK
I am indebted to the blog The Hungry Mouse for the excellent instructions and photographs. I followed the instructions except for the following adaptations:
Rather than scoring the duck's fat, I snipped it in a crosshatch pattern with the tips of kitchen shears. I cut the wings off, and laid them beside the duck on a rack in a shallow roasting pan. I salted the duck inside and out, rubbing the salt in. I did not tie the legs.
My duck was 3.5 pounds, and I was worried about over-roasting, given the recipe's four-hour roasting time for a larger duck. So I raised the oven temperature to 325 degrees. The duck roasted in exactly two hours, and I turned it over once after the first hour. At the two-hour mark, I tested the internal temperature in a thick part of the meat, and it was 165. I removed the duck to a small, shallow casserole, basted it with the sauce, and returned it to the oven for just about 10 minutes at 400 degrees. Shiny, fragrant, crackly, perfection.
My sauce adaptation included smaller amounts for the smaller duck:
1/4 cup molasses
2 tablespoons orange juice
1/4 teaspoon Thai red curry paste
1/4 teaspoon salt
A 1-inch knob of ginger, minced
Grated rind of one organic orange
Combine all ingredients in a small pan and simmer over low heat until reduced to a syrupy state.
The 3.5-pound duck served two people with nice sliced pieces, and the two drumsticks would probably constitute another serving. There are also the smaller pieces of meat taken from the bones later.
Here is my lovely duck fat! Apparently, it is the French secret to glorious fried potatoes.
Tuesday, February 8, 2011
New Zealand Blue Squash Soup with Coconut Milk
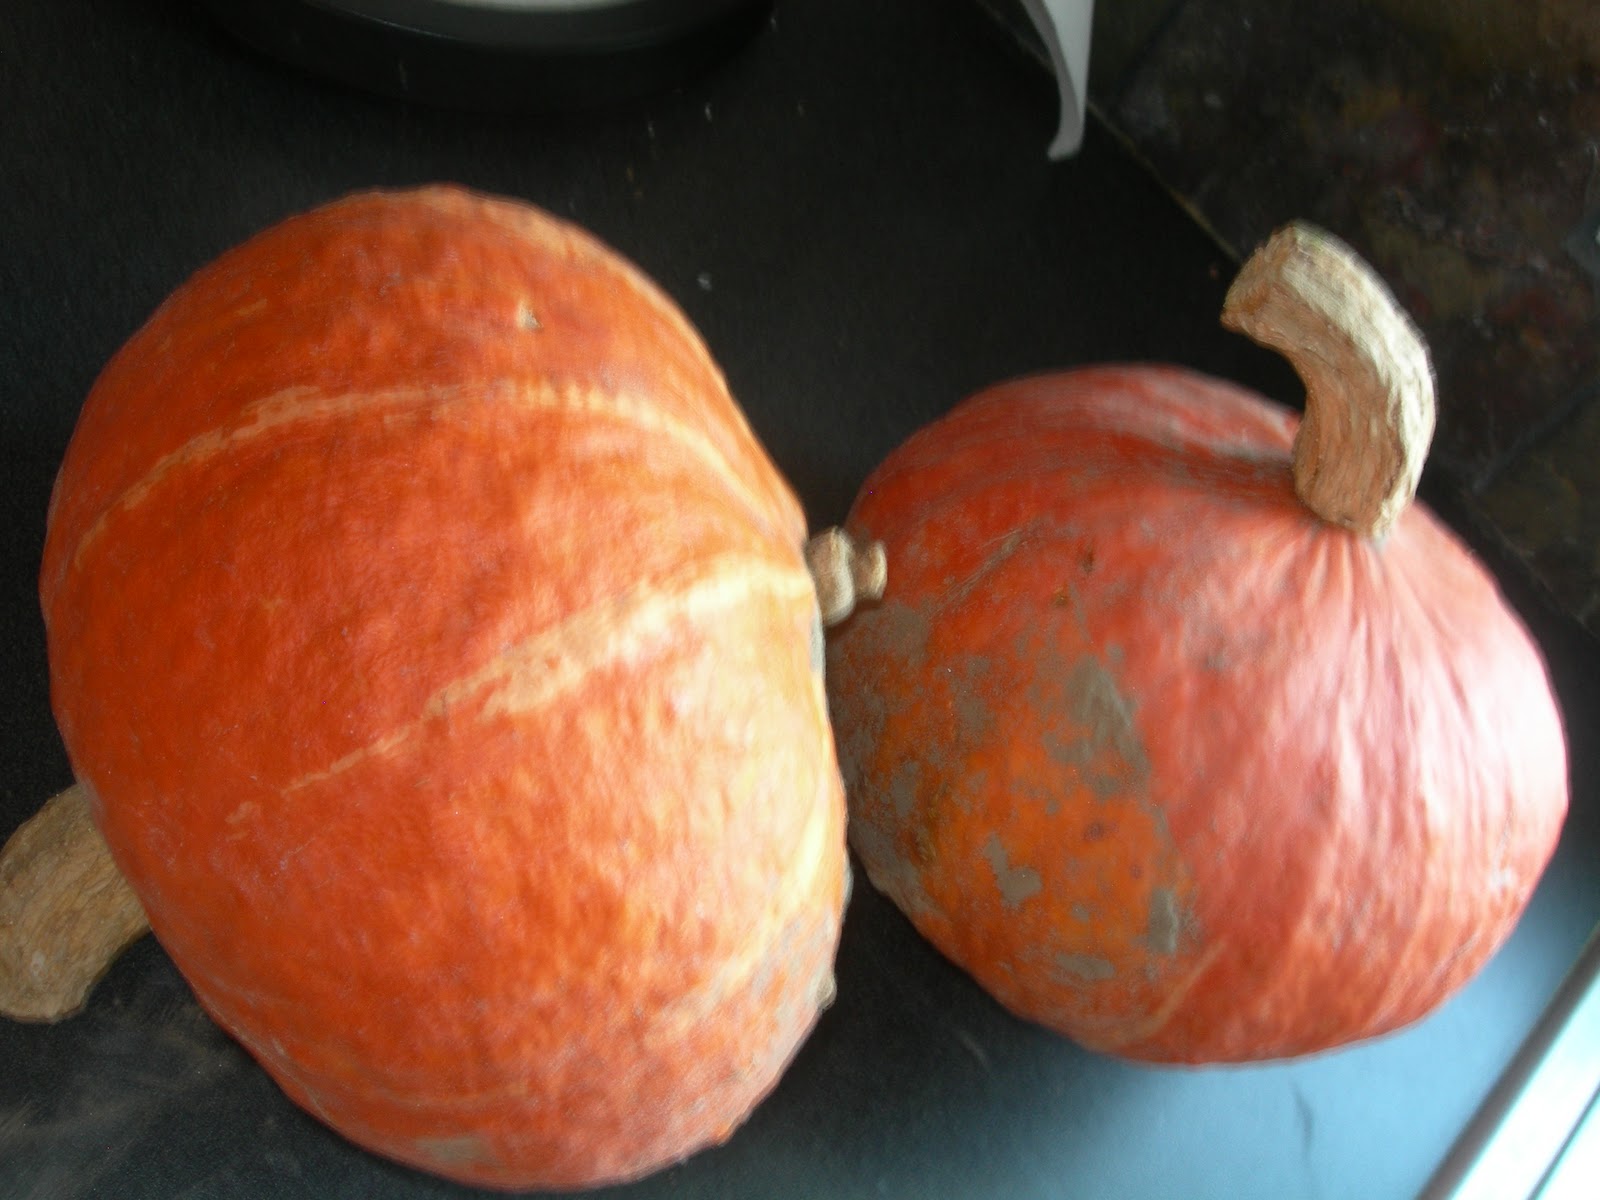
Blithely, I washed my two CSA New Zealand Blue squashes and prepared to split them into chunks. "Why not roast them both!" I thought. "Efficient!
After about twenty minutes of splitting, seeding and scraping, Squash A had established a fierce, gnarly dominance over the entire cookie sheet.
Squash B, vanquished, skulked back to the garage, and Squash A went into the oven.
Whereupon I went outside to my trusty concrete squash-bashing patio and, with a hammer, broke a coconut into pieces, having already drained its liquid. Half an hour later I had, at great risk to myself, picked and pried the coconut meat from the shell with a sharp knife. I had Googled "coconut milk Champion juicer" to find out if I could make my own coconut milk. Yes!
Half an hour later, I had the coconut milk, some lovely shreddy, tasty coconut pulp, and a spectacularly splashed and coconut-speckled kitchen. I then began on the soup.
Some may think I spend too much time cooking. They would not think so after one taste of this sublime soup. Freshly-roasted, densely flavorful squash ... delicately flavored coconut milk ... the sweetest hint of pungent spices ... the tiny crackle of crunchy coriander seed ... do try it!
____________________________________________________
NEW ZEALAND BLUE SQUASH SOUP WITH COCONUT MILK
Adapted from Lentil Breakdown
You could use butternut or other flavorful squash, or pumpkin. You could also use pre-ground spices. Depending on how freshly ground they are, you may wish to adjust amounts. I decided a splash of lime before serving would provide a nice counterpoint.
2- to 3-lb. or so New Zealand Blue or other squash of choice, or pumpkin (to total 4 cups of cooked, mashed squash)
Olive oil or butter
1 tablespoon butter
1 large onion, diced
1 knob ginger, 1" or so square, minced
2 cloves garlic, minced
1 teaspoon cumin seed
1 teaspoon coriander seed
1/4 teaspoon cardamom seed
1 teaspoon salt
4 cups water or vegetable or chicken broth (I used chicken broth)
1 14-oz can coconut milk, or 1-1/2 cups labor-intensive homemade coconut milk
Juice of 1/2 lime
Cilantro sprigs (optional)
Heat oven to 400 degrees. Cut the squash or pumpkin into manageable-sized pieces. Scrape out seeds. A serrated ice cream scoop works great for this. Lavishly oil or butter the cut squash surfaces, and place them on a foil-covered cookie sheet. Roast, checking occasionally for doneness, about an hour and half. The squash should have carmelized in places. Remove, cool a bit, and scrape cooked squash (make sure to get all the carmelized bits in!) into a bowl. You should have about 4 cups of cooked squash.
Crush cumin, coriander and cardamom seeds roughly in a mortar and pestle.
In large pot or Dutch oven, melt 1 tablespoon butter and saute the onions in it until they begin to soften. Add ginger and garlic, and cook a bit more. Scatter spices over, and stir, letting the mixture cook a few minutes until it is redolent with spice scent.
Stir in salt, broth and coconut milk, and simmer 20 to 30 minutes, stirring occasionally. Taste, and add seasoning to your liking. Depending on your squash's absorbency, you may need to add broth or water.
Puree the soup. I used an immersion blender right in the pot to puree the soup, though I didn't puree it to absolute smoothness ... I like a little intrigue in cream soups. You could also transfer it to a blender in batches.
Stir the lime juice into the hot soup just before serving. Garnish with cilantro, a sprinkling of coconut, a curl or two of lime peel ... this soup, from beginning to garnish, is very open to adjustment to your personal taste.
Makes 8 generous servings.
After about twenty minutes of splitting, seeding and scraping, Squash A had established a fierce, gnarly dominance over the entire cookie sheet.
Squash B, vanquished, skulked back to the garage, and Squash A went into the oven.
Whereupon I went outside to my trusty concrete squash-bashing patio and, with a hammer, broke a coconut into pieces, having already drained its liquid. Half an hour later I had, at great risk to myself, picked and pried the coconut meat from the shell with a sharp knife. I had Googled "coconut milk Champion juicer" to find out if I could make my own coconut milk. Yes!
Half an hour later, I had the coconut milk, some lovely shreddy, tasty coconut pulp, and a spectacularly splashed and coconut-speckled kitchen. I then began on the soup.
Some may think I spend too much time cooking. They would not think so after one taste of this sublime soup. Freshly-roasted, densely flavorful squash ... delicately flavored coconut milk ... the sweetest hint of pungent spices ... the tiny crackle of crunchy coriander seed ... do try it!
____________________________________________________
NEW ZEALAND BLUE SQUASH SOUP WITH COCONUT MILK
Adapted from Lentil Breakdown
You could use butternut or other flavorful squash, or pumpkin. You could also use pre-ground spices. Depending on how freshly ground they are, you may wish to adjust amounts. I decided a splash of lime before serving would provide a nice counterpoint.
2- to 3-lb. or so New Zealand Blue or other squash of choice, or pumpkin (to total 4 cups of cooked, mashed squash)
Olive oil or butter
1 tablespoon butter
1 large onion, diced
1 knob ginger, 1" or so square, minced
2 cloves garlic, minced
1 teaspoon cumin seed
1 teaspoon coriander seed
1/4 teaspoon cardamom seed
1 teaspoon salt
4 cups water or vegetable or chicken broth (I used chicken broth)
1 14-oz can coconut milk, or 1-1/2 cups labor-intensive homemade coconut milk
Juice of 1/2 lime
Cilantro sprigs (optional)
Heat oven to 400 degrees. Cut the squash or pumpkin into manageable-sized pieces. Scrape out seeds. A serrated ice cream scoop works great for this. Lavishly oil or butter the cut squash surfaces, and place them on a foil-covered cookie sheet. Roast, checking occasionally for doneness, about an hour and half. The squash should have carmelized in places. Remove, cool a bit, and scrape cooked squash (make sure to get all the carmelized bits in!) into a bowl. You should have about 4 cups of cooked squash.
Crush cumin, coriander and cardamom seeds roughly in a mortar and pestle.
In large pot or Dutch oven, melt 1 tablespoon butter and saute the onions in it until they begin to soften. Add ginger and garlic, and cook a bit more. Scatter spices over, and stir, letting the mixture cook a few minutes until it is redolent with spice scent.
Stir in salt, broth and coconut milk, and simmer 20 to 30 minutes, stirring occasionally. Taste, and add seasoning to your liking. Depending on your squash's absorbency, you may need to add broth or water.
Puree the soup. I used an immersion blender right in the pot to puree the soup, though I didn't puree it to absolute smoothness ... I like a little intrigue in cream soups. You could also transfer it to a blender in batches.
Stir the lime juice into the hot soup just before serving. Garnish with cilantro, a sprinkling of coconut, a curl or two of lime peel ... this soup, from beginning to garnish, is very open to adjustment to your personal taste.
Makes 8 generous servings.
Thursday, February 3, 2011
Celery Root Soup
Lately I've been noticing those interesting vegetables tucked up and back of the more usual, recognizable varieties in the front rows of the produce aisles. Vegetables are playing a much larger role in our lives now, and, after casting my eye further around the available selection than I normally do, I brought home a hulking, monstrous celery root that nearly fell out onto my toes each time I opened the fridge door.
Its destiny was fulfilled last night. This is a delicious soup, despite the unfortunate appearance of a celery root. Or celeriac ... it's the same thing. Still, how pretty is a potato? It's all relative.
This recipe was originally a bisque, but that called for straining it through a sieve, something I am loathe to do to a perfectly good soup. It seems much to me like cutting the crusts off sandwiches. Rustic is more attractive than primped, when it comes to food, no?
________________________________________________
CELERY ROOT SOUP
Adapted from Cooks.com
1 celery root, about 1-1/4 pounds, peeled and cubed
1 large potato or 2 small CSA ones, peeled and cubed
lemon juice
3 tablespoons butter
3 leeks, white and light green parts only, cut in 1/2-inch rounds
3 cloves garlic, minced
5 cups chicken stock (I used stock made with my CG Ranch chickens)
Salt and pepper to taste
1/3 cup Pure Eire cream
2 tablespoon green onions, sliced
As you peel and dice the celery root and potato, place them in a container of water with some lemon juice added to keep them from turning brown. Discard the lemon water after adding celery root and potatoes to the soup.
Melt butter in soup pot, and add leeks and garlic. Saute for 10 minutes or so, until leeks have begun to soften. Add chicken stock, celery root, potatoes, salt and pepper. Bring to a simmer, cover, and cook 30 minutes or until potatoes are tender.
I used an immersion blender to "puree" this soup, as opposed to putting it in batches in a blender. Don't over-puree: Beating with blades releases potato starch and the soup will become gummy.
Stir in cream, taste for seasoning, heat gently through, and serve topped with green onions.
Makes six generous servings.
Its destiny was fulfilled last night. This is a delicious soup, despite the unfortunate appearance of a celery root. Or celeriac ... it's the same thing. Still, how pretty is a potato? It's all relative.
This recipe was originally a bisque, but that called for straining it through a sieve, something I am loathe to do to a perfectly good soup. It seems much to me like cutting the crusts off sandwiches. Rustic is more attractive than primped, when it comes to food, no?
________________________________________________
CELERY ROOT SOUP
Adapted from Cooks.com
1 celery root, about 1-1/4 pounds, peeled and cubed
1 large potato or 2 small CSA ones, peeled and cubed
lemon juice
3 tablespoons butter
3 leeks, white and light green parts only, cut in 1/2-inch rounds
3 cloves garlic, minced
5 cups chicken stock (I used stock made with my CG Ranch chickens)
Salt and pepper to taste
1/3 cup Pure Eire cream
2 tablespoon green onions, sliced
As you peel and dice the celery root and potato, place them in a container of water with some lemon juice added to keep them from turning brown. Discard the lemon water after adding celery root and potatoes to the soup.
Melt butter in soup pot, and add leeks and garlic. Saute for 10 minutes or so, until leeks have begun to soften. Add chicken stock, celery root, potatoes, salt and pepper. Bring to a simmer, cover, and cook 30 minutes or until potatoes are tender.
I used an immersion blender to "puree" this soup, as opposed to putting it in batches in a blender. Don't over-puree: Beating with blades releases potato starch and the soup will become gummy.
Stir in cream, taste for seasoning, heat gently through, and serve topped with green onions.
Makes six generous servings.
Box Six
A bag of beautiful red pears is hiding out under the salad mix. I found a big bag of taters, two squash, dried herbs, fresh cilantro, split peas, apples, and a baby bok choy. I washed the salad greens right away and made Wilted Greens with them, and sauteed the bok choy next morning with shallots and Thundering Hooves sausage, and sprinkled the CSA cilantro o'er all.
Wednesday, January 26, 2011
Grain Free Banana Bread
As part of our Gluten-Free January project, I've tried a few (very few) recipes for baked goods that will satisfy our acquired-over-decades taste for something ....well, baked.
I say "few" because one thing you don't want to do in a healthy diet is replace something unhealthy (white flour baked goods) with something grain free (made with almond flour, almond butter, etc.) and eat it in the same amounts as the white flour stuff.
Muffins, breads and pancakes made with almond butter or almond flour are superb, but they contain enough fat to boost your daily fat intake up to even the Primal Diet's 65 percent fairly quickly. Fortunately, they are also more satisfying and filling! Because they contain few to no concentrated carbs, they don't set you up for the never-ending, carb-craving cycle.
A slice of this bread for breakfast, with fruit, fits nicely into the overall scheme. The Smart Palette's recipe called for unsweetened chocolate chips, which I measured out and had standing by. But I forgot to put them in! I also forgot to sprinkle the top with date sugar, as called for!
No matter. A delicately banana-flavored and filling bread this is, indeed. You will be amazed that it is flour free.
______________________________________________
GRAIN FREE BANANA BREAD
From The Smart Palate, who adapted it from Grain-Free Foodies
2 ripe bananas, mashed
2 large eggs
1 cup unsalted almond butter
2 tablespoons freshly ground flax seeds (I used a blade coffee grinder)
1/2 teaspoon cinnamon
1/2 teaspoon vanilla
Generous pinch of fine sea salt
1/2 teaspoon baking soda
2 teaspoons apple cider vinegar or lemon juice
1/3 cup chopped unsweetened dark chocolate or unsweetened dark chocolate chips
1 teaspoon date sugar, for sprinkling on top
Preheat oven to 350 degrees. In medium mixing bowl, with electric mixer, combine bananas, eggs, almond butter, flax seeds, cinnamon, vanilla and salt. Blend very well; mixture should be quite smooth.
Add baking soda and vinegar and mix briefly. If desired, stir in chocolate.
Spoon batter into a greased (use butter, ghee, or coconut oil) small loaf pan. I used a small Pyrex loaf pan that measures 7-3/4" by 4-1/2". If desired, sprinkle date sugar atop batter.
Bake for 35 to 45 minutes, or until a toothpick inserted into the center of loaf comes out clean. Cool for 15 minutes on a rack, then gently loosen sides with a thin spatula, turn loaf out onto a cooling rack, and cool completely before slicing.
I say "few" because one thing you don't want to do in a healthy diet is replace something unhealthy (white flour baked goods) with something grain free (made with almond flour, almond butter, etc.) and eat it in the same amounts as the white flour stuff.
Muffins, breads and pancakes made with almond butter or almond flour are superb, but they contain enough fat to boost your daily fat intake up to even the Primal Diet's 65 percent fairly quickly. Fortunately, they are also more satisfying and filling! Because they contain few to no concentrated carbs, they don't set you up for the never-ending, carb-craving cycle.
A slice of this bread for breakfast, with fruit, fits nicely into the overall scheme. The Smart Palette's recipe called for unsweetened chocolate chips, which I measured out and had standing by. But I forgot to put them in! I also forgot to sprinkle the top with date sugar, as called for!
No matter. A delicately banana-flavored and filling bread this is, indeed. You will be amazed that it is flour free.
______________________________________________
GRAIN FREE BANANA BREAD
From The Smart Palate, who adapted it from Grain-Free Foodies
2 ripe bananas, mashed
2 large eggs
1 cup unsalted almond butter
2 tablespoons freshly ground flax seeds (I used a blade coffee grinder)
1/2 teaspoon cinnamon
1/2 teaspoon vanilla
Generous pinch of fine sea salt
1/2 teaspoon baking soda
2 teaspoons apple cider vinegar or lemon juice
1/3 cup chopped unsweetened dark chocolate or unsweetened dark chocolate chips
1 teaspoon date sugar, for sprinkling on top
Preheat oven to 350 degrees. In medium mixing bowl, with electric mixer, combine bananas, eggs, almond butter, flax seeds, cinnamon, vanilla and salt. Blend very well; mixture should be quite smooth.
Add baking soda and vinegar and mix briefly. If desired, stir in chocolate.
Spoon batter into a greased (use butter, ghee, or coconut oil) small loaf pan. I used a small Pyrex loaf pan that measures 7-3/4" by 4-1/2". If desired, sprinkle date sugar atop batter.
Bake for 35 to 45 minutes, or until a toothpick inserted into the center of loaf comes out clean. Cool for 15 minutes on a rack, then gently loosen sides with a thin spatula, turn loaf out onto a cooling rack, and cool completely before slicing.
Tuesday, January 25, 2011
Butternut and Spinach Frittata with Cream and Walnuts
Mmm, creamy, squashy, nutty ... superbly satisfying on a cold January evening, with a green salad and grapefruit wedges.
Crank's Bible is a rich compendium of intriguing combinations, and gives great consideration, in an easygoing way, to the pleasure of both eye and palette. I found this cookbook on a sale table some years ago, picked it up, put it down, walked off, walked back ... you know the drill.
I'd had this recipe marked for weeks, and, finally, the perfect evening for it arrived. I used my CSA butternut squash cubes, previously frozen, and local Davis Farms walnuts, Pure Eire cream, and CG Ranch eggs.
Believe it or not, I took this recipe down by half. Nadine Abensur's version was positively Bacchanalian, with a whole dozen eggs and a cup of cream! I did, however, use her full amount of garlic, on my yet-to-be-disproven theory that in most savory dishes, garlic is always welcome.
__________________________________________________
BUTTERNUT AND SPINACH FRITTATA WITH CREAM AND WALNUTS
Adapted from Crank's Bible, by Nadine Abensur
6 local eggs
1/2 cup Pure Eire cream
4 fat garlic cloves, or 8 smaller ones, minced
1/2 teaspoon salt
Freshly ground pepper
1 pound butternut squash cubes
1-2 tablespoons olive oil
1 teaspoon tamari
Dash of Tabasco, or red curry paste, or ground chipotle
5 ounces spinach leaves, washed and big stems removed, or use baby spinach
About 1/4 cup walnut pieces, broken into large-ish pieces
Preheat oven to 425 degrees.
In small bowl, whisk eggs, cream, garlic, salt and pepper, and set aside to infuse.
In large bowl, toss squash cubes with olive oil, tamari and Tabsco, and spread on Silpat-lined cookie sheet. Bake for 20 to 25 minutes, or until squash is fairly soft and edges have begun to carmelize.
Remove squash from oven, spread spinach leaves over squash, and stir the spinach in gently. Return to oven for a few minutes, or until the spinach has wilted a bit.
Carefully spoon squash and spinach mixture onto a frittata pan or suitably sized ovenproof nonstick or seasoned cast iron skillet. Heat over medium heat just until skillet is hot. Pour egg mixture over squash, to fill out to edges of pan.
Now, you may either gently move the squash around, scraping with your spatula through to the pan bottom to allow egg mixture to fully cook, as the author did, or use my optional method of setting the frittata back into the oven, checking every few minutes to see if the eggs have gently set. You don't want the frittata to get dry.
Sprinkle walnuts atop, and leave to set a while at room temperature. Nadine Abensur says this gives it "time to settle and ease into itself." (You see why I bought her cookbook?)
Serves 4 generously.
Crank's Bible is a rich compendium of intriguing combinations, and gives great consideration, in an easygoing way, to the pleasure of both eye and palette. I found this cookbook on a sale table some years ago, picked it up, put it down, walked off, walked back ... you know the drill.
I'd had this recipe marked for weeks, and, finally, the perfect evening for it arrived. I used my CSA butternut squash cubes, previously frozen, and local Davis Farms walnuts, Pure Eire cream, and CG Ranch eggs.
Believe it or not, I took this recipe down by half. Nadine Abensur's version was positively Bacchanalian, with a whole dozen eggs and a cup of cream! I did, however, use her full amount of garlic, on my yet-to-be-disproven theory that in most savory dishes, garlic is always welcome.
__________________________________________________
BUTTERNUT AND SPINACH FRITTATA WITH CREAM AND WALNUTS
Adapted from Crank's Bible, by Nadine Abensur
6 local eggs
1/2 cup Pure Eire cream
4 fat garlic cloves, or 8 smaller ones, minced
1/2 teaspoon salt
Freshly ground pepper
1 pound butternut squash cubes
1-2 tablespoons olive oil
1 teaspoon tamari
Dash of Tabasco, or red curry paste, or ground chipotle
5 ounces spinach leaves, washed and big stems removed, or use baby spinach
About 1/4 cup walnut pieces, broken into large-ish pieces
Preheat oven to 425 degrees.
In small bowl, whisk eggs, cream, garlic, salt and pepper, and set aside to infuse.
In large bowl, toss squash cubes with olive oil, tamari and Tabsco, and spread on Silpat-lined cookie sheet. Bake for 20 to 25 minutes, or until squash is fairly soft and edges have begun to carmelize.
Remove squash from oven, spread spinach leaves over squash, and stir the spinach in gently. Return to oven for a few minutes, or until the spinach has wilted a bit.
Carefully spoon squash and spinach mixture onto a frittata pan or suitably sized ovenproof nonstick or seasoned cast iron skillet. Heat over medium heat just until skillet is hot. Pour egg mixture over squash, to fill out to edges of pan.
Now, you may either gently move the squash around, scraping with your spatula through to the pan bottom to allow egg mixture to fully cook, as the author did, or use my optional method of setting the frittata back into the oven, checking every few minutes to see if the eggs have gently set. You don't want the frittata to get dry.
Sprinkle walnuts atop, and leave to set a while at room temperature. Nadine Abensur says this gives it "time to settle and ease into itself." (You see why I bought her cookbook?)
Serves 4 generously.
Thursday, January 20, 2011
Mixed Berry Flaugnarde with Vanilla Bean
Mixed berry what?
This lush, earthy yet sophisticated dessert proved a beautiful, delicately vanilla-scented solution for a Costco-sized bag of mixed berries that had crouched for months (years?) in the bottom of my freezer. You know, the one you keep moving around when you're looking for other stuff. And you think, "What can I do with two pounds of mixed berries? Why did I buy them in the first place?"
I love The Nourished Kitchen blog, and was enchanted by this recipe that is so satisfying to the senses, uses my berry largesse, and assuages my conscience for ignoring that bag 'o berries for so long.
A flaugnarde (flewn-YARD) is apparently kin to the clafoutis (kah-floo-TEE), but it is flourless and more custardy. As it happened, my aunt had given me a tube of vanilla beans (she'd been to Costco, too, and shared), and my Pure Eire cream was ready for something new.
It does add a little continental flair to say "we're having flewn-YARD" for dessert, but this lovely dish would be good even without announcing it with a French accent.
______________________________________________________
MIXED BERRY FLAUGNARDE WITH VANILLA BEAN
Adapted from The Nourished Kitchen
2 pounds mixed fresh or frozen berries
2 tablespoons vanilla extract
1 egg
2 egg yolks
1/2 cup heavy cream
1/3 cup maple syrup
1 vanilla bean (optional)
Preheat oven to350 degrees.
In a large bowl, toss berries with vanilla extract. Put berries in a baking dish, and roast them for 20 minutes. They should have released most of their juices.
Carefully spoon berries into a colander set over a bowl. Let them drain thoroughly; a screen mesh colander is best. You want them to be as juice-free as possible. Save the juices to use for flavoring other things like smoothies and ice cream, or simmer the juices down to make a lovely, vanilla-scented syrup.
In a small mixing bowl, whisk thoroughly the egg, egg yolks, cream and maple syrup.
Pour the strained berries into a shallow baking dish. I used a 10 1/2-inch Corning ware dish with 1 1/2-inch-tall sides. Spread berries evenly over bottom of dish. If using vanilla bean, lay it on top of the berries. Pour batter over berries and bake for 45 minutes or until the flaugnarde browns and the egg is just set.
Best served warm, after it cools just a bit.
Makes 4 generous servings, or 6 smaller ones
Labels:
Berries,
Desserts,
Grain free,
Local eggs,
Local Milk and Cream,
Paleo
Tuesday, January 18, 2011
Fourth and Fifth Boxes
Box Five ... onions, garlic, salad greens, chickpeas, carrots, chili peppers, a Carnival squash, a New Zealand Blue squash, and (I think) another Kabocha.
Box Four ... taters, squashes, popcorn, lavender, beets, salad greens, and lentils.
Wednesday, January 12, 2011
The Best Kale Dish You've Ever Made
This post's title is a direct quote from Mr. Eating the Scenery, after he finished off his second helping, leaving the dish empty. This was indeed a spectacularly delicious way to prepare kale, which is often found braised with garlic and olive oil, ho hum.
The funny thing is, the original recipe called for crushed coriander seed. For reasons unknown, I read "cardamom," and duly crushed cardamom seed and sprinkled it in at the appointed time. The round, sweet, spicy, exotic flavor seemed to fuse the kale and apples and onions in a wondrous waltz of taste.
I didn't notice until sitting down here with the recipe that it called for coriander seed.
Sometimes a mistake can be wonderful.
The photo I took before we dug in, however, is best forgotten. The sunrise above, looking east from our home, is much more attractive, if tangential to the food theme. Trust me.
___________________________________________
KALE WITH APPLES AND CARDAMOM
From The Smart Palate, tweaked a bit
My bunch of kale was rather small, so this recipe made about two very hearty servings (or four smaller ones). If you use a large bunch of kale, you'll want to increase the olive oil and perhaps use a large onion and a second apple, and increase the spices a bit.
1 tablespoon olive oil
1 small onion, peeled, halved and sliced thinly
1 apple, peeled, cored and sliced thinly
Salt and pepper
1/2 teaspoon crushed cardamom
1/4 teaspoon crushed red pepper flakes
1 bunch kale (I used Lacinato, aka Black Tuscan), washed, cut from center ribs, then sliced thinly
In large skillet with a lid, heat olive oil over medium heat. Toss in the onion and apple, and sprinkle all with salt and pepper. Saute for a minute or so, reduce heat to low, cover and cook until apple and onion begin to sweat (sorry, I just learned that culinary term a bit ago and keep wanting to use it), about 5 to 8 minutes. Add a little water if necessary to keep things from sticking.
Sprinkle cardamom and crushed red pepper over the apple mixture and stir it in, then stir in the kale. Cover and cook for about 10 minutes, or until kale reaches the consistency you like.
An amazing dish.
Makes 2 to 4 servings, depending on size of your kale bunch
The funny thing is, the original recipe called for crushed coriander seed. For reasons unknown, I read "cardamom," and duly crushed cardamom seed and sprinkled it in at the appointed time. The round, sweet, spicy, exotic flavor seemed to fuse the kale and apples and onions in a wondrous waltz of taste.
I didn't notice until sitting down here with the recipe that it called for coriander seed.
Sometimes a mistake can be wonderful.
The photo I took before we dug in, however, is best forgotten. The sunrise above, looking east from our home, is much more attractive, if tangential to the food theme. Trust me.
___________________________________________
KALE WITH APPLES AND CARDAMOM
From The Smart Palate, tweaked a bit
My bunch of kale was rather small, so this recipe made about two very hearty servings (or four smaller ones). If you use a large bunch of kale, you'll want to increase the olive oil and perhaps use a large onion and a second apple, and increase the spices a bit.
1 tablespoon olive oil
1 small onion, peeled, halved and sliced thinly
1 apple, peeled, cored and sliced thinly
Salt and pepper
1/2 teaspoon crushed cardamom
1/4 teaspoon crushed red pepper flakes
1 bunch kale (I used Lacinato, aka Black Tuscan), washed, cut from center ribs, then sliced thinly
In large skillet with a lid, heat olive oil over medium heat. Toss in the onion and apple, and sprinkle all with salt and pepper. Saute for a minute or so, reduce heat to low, cover and cook until apple and onion begin to sweat (sorry, I just learned that culinary term a bit ago and keep wanting to use it), about 5 to 8 minutes. Add a little water if necessary to keep things from sticking.
Sprinkle cardamom and crushed red pepper over the apple mixture and stir it in, then stir in the kale. Cover and cook for about 10 minutes, or until kale reaches the consistency you like.
An amazing dish.
Makes 2 to 4 servings, depending on size of your kale bunch
Monday, January 10, 2011
Homemade Ice Cream with Cherries and Dates
Ever seeking to reduce my use of refined sugar, and increase good fats, I decided to try making some ice cream with no refined sugar at all. I'm certain that using our wonderful, local Pure Eire Jersey cream gave this ice cream its eye-opening, superior taste and texture.
_____________________________________________
HOMEMADE ICE CREAM WITH CHERRIES AND DATES
Just a small dish is immensely satisfying, much like Italian gelato.
1 cup frozen pitted sweet cherries
10 pitted dates
3/4 cup water
2 teaspoons vanilla
1-1/2 cups Pure Eire cream
Place an appropriately-sized glass container with cover in your freezer so it is ready for the ice cream. If you are going to serve it freshly churned, freeze little serving bowls.
In a blender, puree the cherries, dates and water until smooth. Add vanilla and cream, and blend just until cream is incorporated and mix is smooth.
Pour into ice cream maker and process for 15 to 20 minutes, or until the ice cream stiffens and begins to curl around the paddle blades in a big way.
Serve the ice cream right away, or spatula it (hey, if you can spoon something, you can spatula it, right?) into your frozen container. Put right into the freezer.
Makes a little under 4 cups of rich, delicious ice cream, or about 8 servings to savor slowly!
Friday, January 7, 2011
Kabocha with Clothes On
Amazing! Who knew there were squashes whose peels you could eat! Apparently people eat unpeeled kabocha squash all the time! I love it when I emerge from the culinary dark, finally to see something that others have known for millennia. Here's how you do it.
Slice off the stems and blossom ends. Cut off any bumps or damaged spots, and remove any divots.
Then cut the squash in half. Be careful. If you have trouble getting the knife through, take the squash to a concrete area and bang it to complete the split.
Use your trusty serrated ice cream scoop to remove the seeds. Cut squash into dice (about 3/4 inch) and toss in a bowl with 2 tablespoons olive oil. Spread on a Silpat-lined cookie sheet and sprinkle the dices with salt and pepper.

Roast at 400 degrees for 20 to 25 minutes, stirring once at midpoint. The squash will begin to caramelize, and will taste exquisitely sweet and dense.
Other squash varieties whose skins are edible are Delicata and acorn. But you have to make sure the squash is fairly fresh. Apparently the skin grows thicker throughout the winter as the squash loses moisture.
To test for peel edibility, you could cut a cube and microwave it to see if the skin goes soft.
Our venerable CSA farmer grows umpteen varieties of squash and held a squash tasting that I was not able to attend. Perhaps he mentioned this wondrous quality of certain squashes! It certainly speeds the preparation process, and provides an easier source of cubed squash to freeze or roast!
Then cut the squash in half. Be careful. If you have trouble getting the knife through, take the squash to a concrete area and bang it to complete the split.
Use your trusty serrated ice cream scoop to remove the seeds. Cut squash into dice (about 3/4 inch) and toss in a bowl with 2 tablespoons olive oil. Spread on a Silpat-lined cookie sheet and sprinkle the dices with salt and pepper.
Roast at 400 degrees for 20 to 25 minutes, stirring once at midpoint. The squash will begin to caramelize, and will taste exquisitely sweet and dense.
Other squash varieties whose skins are edible are Delicata and acorn. But you have to make sure the squash is fairly fresh. Apparently the skin grows thicker throughout the winter as the squash loses moisture.
To test for peel edibility, you could cut a cube and microwave it to see if the skin goes soft.
Our venerable CSA farmer grows umpteen varieties of squash and held a squash tasting that I was not able to attend. Perhaps he mentioned this wondrous quality of certain squashes! It certainly speeds the preparation process, and provides an easier source of cubed squash to freeze or roast!
Wilted Salad Greens
Traditionally known as "wilted lettuce," this tangy and deeply satisfying salad was commonly served back in the Day. Generally speaking, I refer to the Day when people did not consume processed carbohydrates in the volumes and concentrations found in Big Gulps and giant Venti frappuccinos, unless they were hoisting bales of hay onto trucks all day, or suchlike. And no one fueled themselves on chemical stews of fractured transfats, because they were not concocted yet.
Thus, real fat (butter and such) wasn't cause for any hand-wringing. In fact, our (mostly long-lived) forebears would probably have prepared significantly more of the hot dressing for this salad, hence the "wilted" moniker. But the amounts I use here won't take down your lettuce volume by much.
As we further reduce the amount of processed carbohydrates we consume, and prepare more fresh vegetables, we find that adding real fat becomes appropriate.
Options for additions and variations are many: hard boiled eggs, green onions, herbs, cream in the dressing ... personalize it your way, or find your grandma's recipe for wilted lettuce and find out just how good the Good Old Days really could be!
_____________________________________________
WILTED SALAD GREENS
If you use bacon you have already cut up, fried, and frozen, just heat it in a little skillet to crisp it and release some of the fat, then use olive oil to reach the 2 tablespoons of fat amount.
A medium sized bowl of fresh, CSA salad greens
Natural bacon
Olive oil
Vinegar
Sucanat or agave syrup
Salt
In a little skillet, fry about a cup of bacon pieces (about 4-5 slices). Remove bacon to drain. To the bacon fat, add enough olive oil to reach a volume of about
2 tablespoons. Add 2 tablespoons of vinegar (any kind, really), and 2 teaspoons of your chosen sweetener. Sprinkle on some salt. Whisk and cook a little, until the sweetener is dissolved and the liquid is hot.
Spoon the hot dressing in a swirl over your salad greens. Scatter the bacon pieces atop.
Makes 4 hearty servings
Thus, real fat (butter and such) wasn't cause for any hand-wringing. In fact, our (mostly long-lived) forebears would probably have prepared significantly more of the hot dressing for this salad, hence the "wilted" moniker. But the amounts I use here won't take down your lettuce volume by much.
As we further reduce the amount of processed carbohydrates we consume, and prepare more fresh vegetables, we find that adding real fat becomes appropriate.
Options for additions and variations are many: hard boiled eggs, green onions, herbs, cream in the dressing ... personalize it your way, or find your grandma's recipe for wilted lettuce and find out just how good the Good Old Days really could be!
_____________________________________________
WILTED SALAD GREENS
If you use bacon you have already cut up, fried, and frozen, just heat it in a little skillet to crisp it and release some of the fat, then use olive oil to reach the 2 tablespoons of fat amount.
A medium sized bowl of fresh, CSA salad greens
Natural bacon
Olive oil
Vinegar
Sucanat or agave syrup
Salt
In a little skillet, fry about a cup of bacon pieces (about 4-5 slices). Remove bacon to drain. To the bacon fat, add enough olive oil to reach a volume of about
2 tablespoons. Add 2 tablespoons of vinegar (any kind, really), and 2 teaspoons of your chosen sweetener. Sprinkle on some salt. Whisk and cook a little, until the sweetener is dissolved and the liquid is hot.
Spoon the hot dressing in a swirl over your salad greens. Scatter the bacon pieces atop.
Makes 4 hearty servings
Monday, January 3, 2011
The Things We Do for Squash
No other vegetable plays so hard to get. Even optimistic I, on occasion, am daunted by their thick-skinned impenetrability. But as everyone knows it's better to have attempted to cook squash than never to have cooked it at all.
To that end, with visions of happy-ever-after roasted squash dishes dancing in my head, I boldly brought in my CSA squash a while back, during that particularly cold spell we had where the north wind was bitingly fierce. Darkness was falling. I couldn't get the knife to fully split the squash, so gathered squash and knife and headed out my (north facing) dining room door to the back patio, where there was concrete. The wind immediately blasted into the house, so I pulled the door quickly shut.
Not until I had slammed the knife-impaled squash onto the concrete, thus splitting it, did I find that I had failed to fully unlock the door. I was now locked outside, in the near dark, with a split squash, a knife, no coat, and an unmercifully arctic north wind bearing down upon me.
I recalled with great vividness the discussion Mr. Eating the Scenery and I had recently about our non-operative garage door keypad. It was still inoperable. The keybox by the back door (also north facing) was my only hope. I don't think I've ever been as close to frostbite as I was fiddling with that frigid metal keybox, feeling for the number sequence and punching numbers in the dark, for around 20 minutes, failing to get it unlocked and growing fumblier minute by frosty minute.
Still, I have wonderful neighbors, and had they been home, I'm sure they would have welcomed me in, big chef's knife, squash and all, for tea and cookies while I waited for Mr. Eating the Scenery to arrive home. As it was, at last I succeeded in opening the keybox and the door. I needed no trip to the emergency room but was fascinated by the pain involved in slowly thawing my fingertips under tepid water.
Squash hurts.
To that end, with visions of happy-ever-after roasted squash dishes dancing in my head, I boldly brought in my CSA squash a while back, during that particularly cold spell we had where the north wind was bitingly fierce. Darkness was falling. I couldn't get the knife to fully split the squash, so gathered squash and knife and headed out my (north facing) dining room door to the back patio, where there was concrete. The wind immediately blasted into the house, so I pulled the door quickly shut.
Not until I had slammed the knife-impaled squash onto the concrete, thus splitting it, did I find that I had failed to fully unlock the door. I was now locked outside, in the near dark, with a split squash, a knife, no coat, and an unmercifully arctic north wind bearing down upon me.
I recalled with great vividness the discussion Mr. Eating the Scenery and I had recently about our non-operative garage door keypad. It was still inoperable. The keybox by the back door (also north facing) was my only hope. I don't think I've ever been as close to frostbite as I was fiddling with that frigid metal keybox, feeling for the number sequence and punching numbers in the dark, for around 20 minutes, failing to get it unlocked and growing fumblier minute by frosty minute.
Still, I have wonderful neighbors, and had they been home, I'm sure they would have welcomed me in, big chef's knife, squash and all, for tea and cookies while I waited for Mr. Eating the Scenery to arrive home. As it was, at last I succeeded in opening the keybox and the door. I needed no trip to the emergency room but was fascinated by the pain involved in slowly thawing my fingertips under tepid water.
Squash hurts.
Greek Potatoes
So good it makes you want to do a stomping dance and break some glassware.
Earlier this fall, as I was buying leeks (when my local ones were gone, I didn't seem to be able to be without them) at the grocery store, the checker asked me what I did with them. There are so many things! But of course I was struck dumb, as we so often are when there is so much to say, and could only blurt things like "soup" and "eggs."
But I shall take this recipe to her. No one who asks me for ideas or recipes shall be left in the dark.
_________________________________________
GREEK POTATOES
Adapted from Plenty by Diana Henry
2 cloves garlic, minced or crushed
1 cup lowfat yogurt
1/4 cup olive oil
5 leeks, white and light green parts only, cut into chunks
1-1/4 lb. Yukon Gold or red potatoes, peeled and cut into chunks slightly larger than the leek chunks
Salt and pepper
12 to 16 ounces spinach, chard, or other greens, more or less to taste, sliced
Salt and pepper
1/4 cup chopped fresh dill
1 to 2 tablespoons chopped fresh mint
A glug of lemon juice
Mix the garlic and yogurt and set aside.
Heat 2 tablespoons of the olive oil in a heavy skillet. Add leeks and potatoes, and season them with salt and pepper. Heat over a low temperature for 20 minutes or so. Check occasionally and add water if needed. This seems to be called "sweating," and indeed the potatoes and leeks will look a bit like they are doing hot yoga.
When potatoes are not crisp but are less than tender, add the spinach and the remaining 2 tablespoons of olive oil. Mix gently, add a little more water, sprinkle with salt and pepper, and cover. Cook about 5 minutes or until the greens have wilted nicely.
Stir in the dill, mint and lemon juice. At this point I stirred in the garlic/yogurt mixture, but the original recipe advises us to serve it alongside, a perfectly acceptable option.
Makes 6 side dish servings
Earlier this fall, as I was buying leeks (when my local ones were gone, I didn't seem to be able to be without them) at the grocery store, the checker asked me what I did with them. There are so many things! But of course I was struck dumb, as we so often are when there is so much to say, and could only blurt things like "soup" and "eggs."
But I shall take this recipe to her. No one who asks me for ideas or recipes shall be left in the dark.
_________________________________________
GREEK POTATOES
Adapted from Plenty by Diana Henry
2 cloves garlic, minced or crushed
1 cup lowfat yogurt
1/4 cup olive oil
5 leeks, white and light green parts only, cut into chunks
1-1/4 lb. Yukon Gold or red potatoes, peeled and cut into chunks slightly larger than the leek chunks
Salt and pepper
12 to 16 ounces spinach, chard, or other greens, more or less to taste, sliced
Salt and pepper
1/4 cup chopped fresh dill
1 to 2 tablespoons chopped fresh mint
A glug of lemon juice
Mix the garlic and yogurt and set aside.
Heat 2 tablespoons of the olive oil in a heavy skillet. Add leeks and potatoes, and season them with salt and pepper. Heat over a low temperature for 20 minutes or so. Check occasionally and add water if needed. This seems to be called "sweating," and indeed the potatoes and leeks will look a bit like they are doing hot yoga.
When potatoes are not crisp but are less than tender, add the spinach and the remaining 2 tablespoons of olive oil. Mix gently, add a little more water, sprinkle with salt and pepper, and cover. Cook about 5 minutes or until the greens have wilted nicely.
Stir in the dill, mint and lemon juice. At this point I stirred in the garlic/yogurt mixture, but the original recipe advises us to serve it alongside, a perfectly acceptable option.
Makes 6 side dish servings
Subscribe to:
Posts (Atom)
