Showing posts with label Desserts. Show all posts

Friday, March 23, 2012

Coconut Cream Bark Three Ways

From left:  Cherry-Almond, German Chocolate,
 and Useful Plain Coconut Cream Barks
"What to do with coconut butter" is one of the most common search phrases I see on my blog stats.

Tropical Traditions is an excellent online vendor
 of coconut products.
Coconut butter (and coconut cream) do seem rather unapproachable, sitting solidly in their jars as they do.  Gently heated in a pan of water on the stove, though, they become quite willing to cooperate with your creativity.

Easiest by far is to make bark.  I've made lots of plain coconut cream bark, which can be used, mixed into gently warmed water, to create coconut milk on demand. 

Winter CSA Box 9's dried local tart cherries offered a great opportunity to finally follow the impulse I've been having lately to mix things into coconut cream.

Eating the way we do, tooth-achingly sweet desserts and candies are a thing of the past.   But these delicious coconut cream barks provide a flavorful, satisfying bite or two of a confectionary nature, without being overly sweet.

And of course, these combinations are just the beginning.   I'm thinking pistachioes with cranberries .... maybe toasted pumpkin seeds with cinnamon and vanilla ... or chopped dried pineapple for a pina colada version.  

Here are more ideas for coconut butter and coconut cream.  I've melted the plain shards directly into curries and soups.

Coconut butter and coconut cream can be stored unopened in their jars at room temperature.  Once made into bark, the bark should be stored in the refrigerator so that the pieces don't soften.  Coconut oil differs in that it is pure oil and is quite dense.  Coconut oil can be stored at room temperature, and in fact will be easier to use if you do so.

Is there a difference between coconut butter and coconut cream?  I think they're nearly interchangeable, but coconut cream seems to be smoother than coconut butter.


COCONUT CREAM BARK THREE WAYS

Plain, Useful Coconut Bark

1 jar (16 ounces) coconut cream or coconut butter

Instructions:

Place an 11" x 17" Silpat liner on a baking sheet, then place the baking sheet in the freezer.

Remove lid from jar of coconut butter, and set the jar in a pan of hot water over very low heat.  Check occasionally, and when it's soft enough to stir until smooth, get the baking sheet out of the freezer and pour the coconut cream onto the Silpat.  Spread evenly, and return the baking sheet to the freezer.

In a very short time the bark will be solid.  Peel the Silpat off the back of the bark, and break the bark into shards of varying sizes.  Store the shards in a container in the fridge, and when you need coconut milk, figure about 2 tablepoons of bark to 1/2 cup water, gently heating the water and stirring in the bark until it's a liquid.  You can vary the ratio of coconut cream to water, to suit your taste.

German Chocolate Coconut Bark

1 jar (16 ounces) coconut cream or coconut butter
1 bar Theo 91% cacao dark chocolate (or less to taste), gently melted
1 cup shredded coconut
1 cup chopped pecans

Cherry-Almond Coconut Cream Bark

1 jar (16 ounces) coconut cream or coconut butter
1-1/4 cups (about 7 ounces) dried tart cherries
1 cup chopped almonds
1 teaspoon almond extract


For each of these bark variations, pour the softened coconut cream into a medium bowl.  Mix in the ingredients shown, and spread onto a Silpat-lined baking sheet that has been chilled in the freezer.

Proceed as for plain coconut bark, spreading the mixture thinly, chilling, and breaking into pieces.  I scored the chocolate bark as it began to set, which resulted in squares rather than shards.

Update:  Made the chocolate version with chopped macadamias instead of pecans, and used 1/2 cup coconut for a smoother bark.  Wonderful!

Another update:  Made the cherry-almond version with chopped dried pineapple and chopped roasted, salted pistachios instead of the cherries and almonds.  Delicious!  Also added 1/2 cup shredded coconut, and left out the almond extract.

Friday, May 13, 2011

What to do with Coconut Butter

Healthy fats like coconut oil beat sugar and flour every time for clean, sustained energy and a happy metabolism. 

So, in the midst of the Easter onslaught of factory-churned-out chocs and candies with additives galore, I just got out my beautiful marble Easter eggs for color, and made Nancy's coconut-date energy balls.

These are really, really, good, plus, as you can see from Nancy's description, they have all kinds of positive health implications.  I increased the organic citrus peels to two teaspoons each, which gives these little citruspheres a powerful resemblance in taste to those horribly unhealthy lemon bars which we all remember fondly for their ability to make our teeth hurt.  We should have listened to our teeth!  Our bodies didn't want that much pure refined sugar.  Nancy kept going on her theme and developed raw cacao superfood truffles, which look tempting to me to try.

As often happens, finally having found a recipe that used the coconut butter I'd bought on impulse, another way to use this luscious stuff appeared.  Ryan's coconut cream and blueberry bark is incredibly delicious.

As with the citrus balls, you soften the jar of coconut butter (or coconut cream) in a pan of warm water on the stove, pour it out (I used a Silpat; Ryan used parchment paper) and slap frozen blueberries evenly across the top.  The frozen blueberries solidify the coconut butter.  Just break the bark into bite-sized pieces (this is important, because chomping into a big piece may cause a blueberry laundry crisis) and store 'em in the fridge.

Many thanks to Nancy and Ryan for adding variety to my energy arsenal!

More ideas for making coconut bark here.

Update:   Here's a seriously convenient way to keep coconut cream and coconut butter accessible.  If you've ever tried to dig 'em out of the jar with a pointy knife, you know what I mean.  Warm the coconut cream or coconut butter in the uncovered jar set in a pan of water on the stove.  May take 15 minutes or so at a simmer.  Stir occasionally.  When soft, spread coconut cream or coconut butter onto a Silpat.  Let harden, and either cut or break into roughly tablespoon-sized pieces.  Store them in a jar or other container.  For coconut cream, one tablespoon heated with 1/4 cup water makes 1/4 cup.  Stir a piece or two into curries, with a little water, or into sauteed veggies with Asian seasonings.  For the coconut butter ... you can either resoften with your preferred warming method, or just enjoy it as a snack.
Coconut cream pieces ready to reconstitute ... or just eat!

Thursday, January 20, 2011

Mixed Berry Flaugnarde with Vanilla Bean


Mixed berry what?

This lush, earthy yet sophisticated dessert proved a beautiful, delicately vanilla-scented solution for a Costco-sized bag of mixed berries that had crouched for months (years?) in the bottom of my freezer.   You know, the one you keep moving around when you're looking for other stuff.  And you think, "What can I do with two pounds of mixed berries?  Why did I buy them in the first place?"

I love The Nourished Kitchen blog, and was enchanted by this recipe that is so satisfying to the senses, uses my berry largesse, and assuages my conscience for ignoring that bag 'o berries for so long.

A flaugnarde (flewn-YARD) is apparently kin to the clafoutis (kah-floo-TEE), but it is flourless and more custardy.  As it happened, my aunt had given me a tube of vanilla beans (she'd been to Costco, too, and shared), and my Pure Eire cream was ready for something new.

It does add a little continental flair to say "we're having flewn-YARD" for dessert, but this lovely dish would be good even without announcing it with a French accent.
______________________________________________________
MIXED BERRY FLAUGNARDE WITH VANILLA BEAN
Adapted from The Nourished Kitchen

2 pounds mixed fresh or frozen berries
2 tablespoons vanilla extract

1 egg
2 egg yolks
1/2 cup heavy cream
1/3 cup maple syrup

1 vanilla bean (optional)

Preheat oven to350 degrees.

In a large bowl, toss berries with vanilla extract.  Put berries in a baking dish, and roast them for 20 minutes. They should have released most of their juices.

Carefully spoon berries into a colander set over a bowl.  Let them drain thoroughly; a screen mesh colander is best.  You want them to be as juice-free as possible.  Save the juices to use for flavoring other things like smoothies and ice cream, or simmer the juices down to make a lovely, vanilla-scented syrup.

In a small mixing bowl, whisk thoroughly the egg, egg yolks, cream and maple syrup.

Pour the strained berries into a shallow baking dish.  I used a 10 1/2-inch Corning ware dish with 1 1/2-inch-tall sides.  Spread berries evenly over bottom of dish.  If using vanilla bean, lay it on top of the berries.   Pour batter over berries and bake for 45 minutes or until the flaugnarde browns and the egg is just set.

Best served warm, after it cools just a bit.

Makes 4 generous servings, or 6 smaller ones

Monday, January 10, 2011

Homemade Ice Cream with Cherries and Dates


Ever seeking to reduce my use of refined sugar, and increase good fats, I decided to try making some ice cream with no refined sugar at all.  I'm certain that using our wonderful, local Pure Eire Jersey cream gave this ice cream its eye-opening, superior taste and texture.
_____________________________________________
HOMEMADE ICE CREAM WITH CHERRIES AND DATES

Just a small dish is immensely satisfying, much like Italian gelato.

1 cup frozen pitted sweet cherries
10 pitted dates
3/4 cup water

2 teaspoons vanilla
1-1/2 cups Pure Eire cream

Place an appropriately-sized glass container with cover in your freezer so it is ready for the ice cream.  If you are going to serve it freshly churned, freeze little serving bowls. 

In a blender, puree the cherries, dates and water until smooth.  Add vanilla and cream, and blend just until cream is incorporated and mix is smooth.

Pour into ice cream maker and process for 15 to 20 minutes, or until the ice cream stiffens and begins to curl around the paddle blades in a big way.

Serve the ice cream right away, or spatula it (hey, if you can spoon something, you can spatula it, right?) into your frozen container.  Put right into the freezer.

Makes a little under 4 cups of rich, delicious ice cream, or about 8 servings to savor slowly!

Saturday, December 25, 2010

Western Dried Fruits Cake


A gem of a cake made entirely of nuts and dried fruits, with just enough vanilla-scented batter to hold it all together.  Beautiful, jewel-like slices go wonderfully with coffee and tea, or on a plate of cookies and candies for dessert after a holiday meal.

This recipe came out in the 80's and I've seen many versions since then, varying the fruits and nuts, adding candied ginger and such.  But for a pure, heavenly taste that unquestionably deserves all the superlatives you can give it, this original version is the ticket.

I've been making this cake in little foil pans for around 25 years now, and giving them as gifts.  Merry Christmas!
___________________________________________________
WESTERN DRIED FRUITS CAKE
From Sunset Magazine

A couple of hints:  Snip the apricots into quarters using kitchen shears.  It's easier than using a knife.  To butter the pans, use a brush dipped in melted butter; brush the butter onto the waxed paper lining also.

1 cup chopped pitted dates
2 cups quartered dried apricots
1 cup golden raisins
1-1/2 cups whole blanched almonds
1-1/2 cups walnut pieces
3/4 cup all-purpose flour
3/4 cup sugar
1/2 teaspoon baking powder
3 eggs
1 teaspoon vanilla

Butter a 5- x 9-inch loaf pan; line with baking parchment or waxed paper, then butter the paper.

In small bowl, combine flour, sugar and baking powder to blend.  

In large bowl, combine dates, apricots, raisins, almonds and walnuts.  Add flour mixture to fruits and mix evenly.

Beat eggs with vanilla to blend.  Stir thoroughly into fruit mixture.  Spoon batter into prepared loaf pan and spread evenly; press batter into corners of pan, and press batter down as you fill the pan so there are no gaps.  Shape the batter so it's a bit rounded on the top of the loaf.

Bake in a 300-degree oven until golden brown, about 2 hours.  Cool in pan on a wire rack for 10 minutes, then turn out of pan.  Peel off paper and let cake cool on rack.

Wrap in plastic wrap or foil.  Chill at least two days or up to two months.  Or eat it immediately!  The flavor is excellent fresh, too.  If desired, sprinkle the top of the cake with 1 tablespoon rum or brandy once a week.

Makes 1 loaf

Gift loaves option:  Double the recipe.  Use six small foil loaf pans, about 3 x 6 inches.  Butter and line pans as instructed above.  Be sure to push batter into corners of pans and press down so the loaf is compact.  Bake at 250 degrees (a cooler temperature than the big, single loaf) for 2 hours.  Watch the cakes during the last hour to prevent burning.  For these small loaves, I found that 300 degrees was too hot.

Tuesday, December 14, 2010

That Casa Mia Mango Dessert

Casa Mia makes a delicious dessert of zabaglione topped with mango puree.  My Costco mangoes were ripening alarmingly fast, so I decided to sort of replicate the Casa Mia dessert using my Pure Eire milk and cream.  Now, I use very little dairy, but can't seem to resist picking up some Pure Eire whenever I'm in one of our local health food stores.  My philosophy is that if you're going to have some dairy, why not have fresh, local dairy, from Jersey cows?

So.  I sliced two mangoes into the blender, and added enough milk and cream (okay, more cream than milk) so that the whole thing could blend into two servings worth of delicious, creamy, mango-y dessert.  Satisfying, and no processed sugar involved. 

Friday, October 1, 2010

Wedding Applesauce with Granny Smiths and Metaphor


This week my stepdaughter was married.  Naturally, the newlyweds have been on our minds a lot.  Today as I was making applesauce of delicious, local, organic Granny Smith apples, I was reminded that Grannies are my stepdaughter's favorite apples.  I noticed that the knob of ginger I peeled looked like a little bluebird of happiness.


As I peeled and sliced, simmered and spiced, I knew this applesauce was taking on a special meaning, like every good marriage does. And that a little metaphor might be in order, considering this new marriage in our family.

Granny Smiths can soak up a lot of water, so you have to keep checking in to see if you should add some. 

Tangy by nature, Grannies need a little sweetening, but not too much.  The sauce is better with a little texture, rather than blended boringly smooth.  I added fresh grated ginger for warmth, and cinnamon for a little spice. Applesauce can be soothing to come home to after a rough day, especially if it's made with love.

 This post's for you, kids.  May your trip through life together be warm and sweet.
________________________________________________
WEDDING APPLESAUCE

About 9 good-sized Granny Smith apples
A knob of ginger
A tablespoon or so of cinnamon
Honey or agave nectar, to taste

Peel, core and slice the apples into a large pot.  Peel the ginger and grate it over the apples.  Add about half an inch of water to the pot.  Simmer, stirring frequently, as apples begin to cook.  Add more water if necessary.  Cook until desired texture is achieved.  Remove from heat and stir in cinnamon and sweetening, if desired.  Share with someone you love.

Makes about 8 cups

Thursday, September 16, 2010

Raspberry Cream Scones

For some reason, I always thought a "cream scone" meant that you sliced it and put clotted cream on it. But no. You put the cream, a whole delectable cup of it, right into the dough. This makes a scone that puts anything you'll find at Starbucks, or almost anywhere else, into oblivion.

Be sure to use divine, local Pure Eire cream! Other fruits, fresh or dried, and nuts would work wonderfully here, I think. The key is to be quick and gentle when handling the dough.
_____________________________________________
RASPBERRY CREAM SCONES
Adapted from America's Test Kitchen Cookbook

2 cups all-purpose flour
1 tablespoon baking powder
3 tablespoons sugar
1/2 teaspoon salt

5 tablespoons chilled butter, cut into 1/2-inch cubes

1 cup heavy cream
1 cup raspberries

Adjust oven rack to middle position and heat oven to 425°F.

Place flour, baking powder and sugar in food processor. Pulse a few times to blend.

Scatter butter pieces evenly over dry ingredients. Cover and pulse (about 1 second per pulse) 10 times. Butter should be evenly chopped. Transfer mixture to large bowl.

Quickly stir in heavy cream using a rubber spatula, just until mixed and a dough begins to form, then gently and quickly fold in raspberries.

Gather dough and knead gently on a floured board for about 30 seconds. Flatten dough with you hands into an 8- or 9-inch round, then quickly cut the round into eight wedges, using a long, sharp knife or a pastry scraper. (You can cut rounds, as in biscuits, but the more you handle the dough the less tender it will become.)

Place scones on Silpat-lined or ungreased baking sheet and bake until tops are light brown, 12 to 15 minutes. Cool on wire rack for at least 10 minutes. Serve warm or at room temperature.

Makes 8 scones


Thursday, September 9, 2010

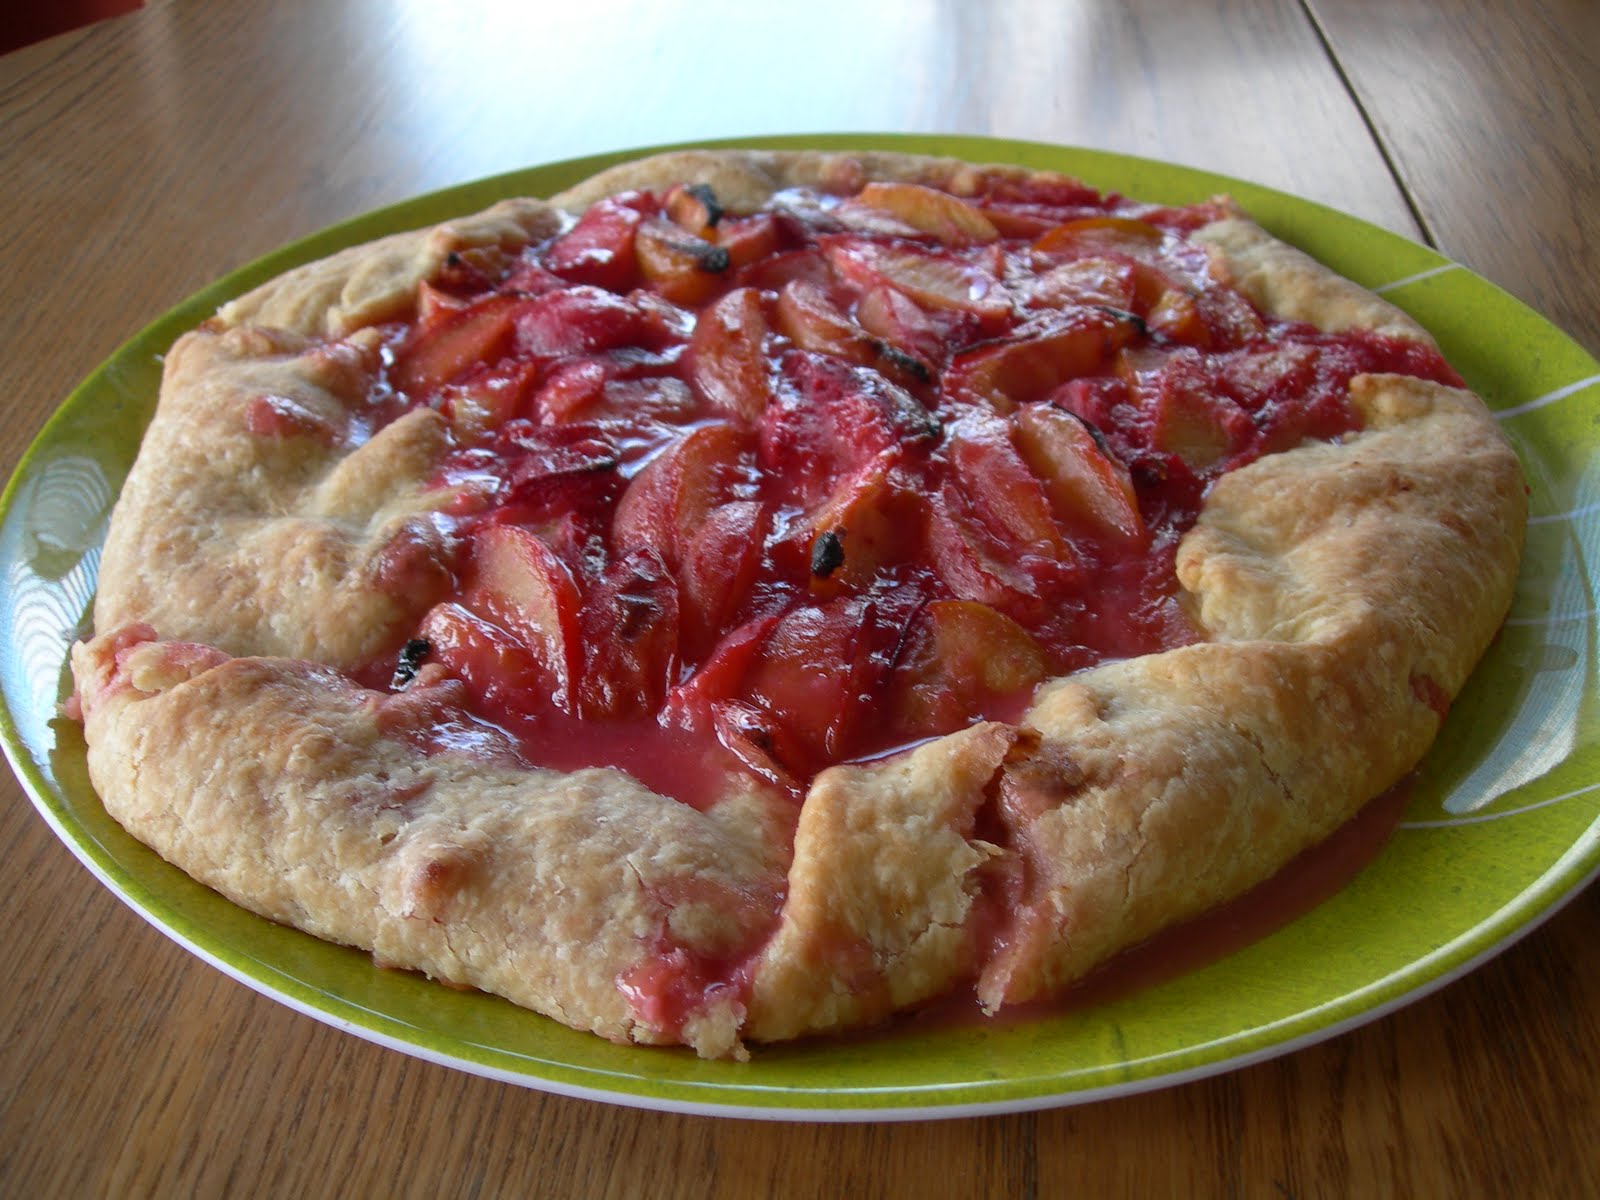
Rustic Tart of Local Plums

I admit to being somewhat beguiled by the word "rustic." I first saw it relating to edibles in a little bistro/pub in Twisp, Washington. "Rustic vegetable tart with cornmeal crust," the menu said.

The word was used to justify having just gathered the pastry up around the filling, rather than rolling it out and putting it in a pan. Well, I'm all for labor saving, and if calling something rustic gives me carte blanche to do so, I say yea!

In fact, the French have legitimized the whole process by calling these casual pies "galettes." And that's fine with me, too.
___________________________________________
RUSTIC TART OF LOCAL PLUMS

I can't remember where I found this recipe, but I've significantly altered it. The original called for sliced almonds to be stirred into the filling, Amaretto cookie crumbs (ridiculously expensive) to be scattered underneath the plums, and the pastry to be brushed with heavy cream and sprinkled with coarse brown sugar before baking. None of that, however, is necessary to produce a superb, memorable and delicious plum tart.

Pastry:
1-1/2 cups all-purpose flour
1 tablespoon sugar
1/2 teaspoon salt

7 tablespoons cold butter, cut into pieces
5 to 6 tablespoons cold water

Filling:
1/2 cup sugar (or less)
3 tablespoons all-purpose flour
1/4 teaspoon freshly ground nutmeg

2-1/2 pounds (about 8 large) not-too-ripe-or-juicy plums or pluots, pitted and cut into eighths
1 tablespoon lemon juice

Assembly:

1 egg, beaten

In food processor, combine flour, sugar and salt; pulse to mix. Add butter and pulse briefly just until coarse crumbs form. Add cold water and process in pulses until a loose ball of pastry forms. Add more water very gradually if necessary; the less you process the pastry, the flakier it will be. Gather pastry into a ball, flatten slightly, wrap in plastic, and refrigerate while you prepare the filling.

In large bowl, mix sugar, flour and nutmeg. Slice plums into a colander set over a plate. You don't want massively juicy plums for this recipe. Save the juicy ones to eat while standing over the kitchen sink!

Heat oven to 425 degrees F.

On a lightly floured board, roll out pastry to a 14-inch round. Gently fold pastry round into quarters and transfer to a baking sheet (with Silpat liner) and unfold the round. Brush the beaten egg in a circle in the center of the round, leaving about a 2-inch egg-free border.

Quickly stir plums into flour mixture, and add lemon juice. Pile plums quickly onto the center of the pastry, in the egged area (the egg seals the pastry and keeps the plum juices from softening the crust), and bring the sides of the pastry up around them.

Bake in middle of oven for 25 minutes, then check. If pastry is getting too brown, cover with aluminum foil. Bake another 15 to 20 minutes. Cool. Slice into 8 pieces and serve with creme fraiche, ice cream, or whipped cream.

Serves 8

Wednesday, September 8, 2010

Fresh Pear Sauce with White Wine and Cardamom


September has come upon us. The chill of night, the heaped cumulus clouds in the sharp blue sky of day ... and the abundance, nay, plethora, of fresh fruit lying around the kitchen. For example, the armful of pears given to me last week.

To a frugal cook, such questions as, "Can you make sauce out of pears like you can with apples?" are common. The answer to this one is, I am happy to say, most definitely yes.

I chose white wine over red to avoid the potential result of a nasty shade of pink or purple in the resulting sauce; as well, it seemed cardamom would go well with pears' more exotic taste, and indeed it does. But stealing the cinnamon from apples would do, too, if you have no cardamom.
___________________________________________
FRESH PEAR SAUCE WITH WHITE WINE AND CARDAMOM

This sauce is wonderfully fragrant and delicious; the pears' flavor mingles in a happily companionable way with the wine and cardamom. It's truly elegant enough to serve with a special meal such as roast pork, or alongside an autumnal dessert like fresh gingerbread.

About 10 fresh pears
A blub of white wine
1/2 teaspoon freshly ground cardamom seeds (I used a mortar and pestle)

Peel, core and quarter or dice the pears, and put them in a medium-sized pan or pot. Toss in the blub of white wine and the cardamom, and bring the whole thing to a simmer, cooking until the sauce reaches the texture you prefer--slightly chunky or more smooth. If you like, run a potato masher through it to even the texture.

Makes about 5 1-cup servings.

Sunday, August 1, 2010

Tooth Cookies


It's not every day that one's stepdaughter graduates with a Bachelor's Degree in Dental Hygiene. We are so proud of her! This weekend's barbecue in her honor included these delicious sugar cookies ... the ONE time when the bright yellow color of our local eggs may not play to best advantage! Still, these probably look better than chocolate teeth cookies would have, an idea nixed by Mr. Eating the Scenery.

Actually, the title of this blog came from my stepdaughter. Years ago, when her brother was eyeing the kale garnish on his plate in a restaurant, she told him, "Don't eat that--it's just scenery." Thus are family legends, and blog titles, born.
_________________________________________
TOOTH COOKIES
Adapted from Epicurious.com

This dough really rolls and re-rolls nicely.

1 cup (2 sticks) unsalted butter, room temperature
1 cup organic sugar (original called for packed brown sugar; not a tooth color, I thought)
1 large egg
1 teaspoon vanilla
2-2/3 cups all purpose flour
1 teaspoon baking powder
1/2 teaspoon salt
1/2 teaspoon ground nutmeg

Cream butter and sugar until smooth. Beat in egg and vanilla. Add 2-1/3 cups of the flour, then scatter the baking powder, salt and nutmeg over the flour. Beat until mixed.

Spread 1/3 cup flour over a kneading surface, and knead it into the dough for about 1 minute. Add flour if the dough is too wet. The dough will be soft.

Flatten dough into a 1-inch thick rectangle. Cut into four equal pieces, wrap, and chill for at least 2 hours. If chilled longer, let soften a bit at room temperature.

Roll one piece of dough 1/8-inch thick, making sure to dust the dough with flour and turn it a time or two. Cut cookies, place on baking sheets (I used a Silpat; otherwise you may wish to use parchment) and bake for 10-11 minutes at 350 degrees or until cookies begin to show a little browning. Remove from oven, and let rest on baking sheets 5 minutes before placing cookies on cooling racks or paper towels.

Reroll scraps, blending them in with new dough you take from the fridge one piece at a time. Roll, cut, repeat.

When cooled, cookies may be stored between layers of waxed paper in an airtight container at room temperature.

Made about 16 4" x 6" cookies; will make more if the cookies are smaller, obviously!

Wednesday, June 30, 2010

Basil-Mint Sorbet

Nothing evokes the essence of summer like basil--you know that sudden wave of sunshine that washes over you in winter when you open a freezer bag of the pesto you made in August? This sorbet goes even further ... it's transporting, ambrosial; the mint and basil combine in a heavenly taste that opens eyes in surprise and conducts a symphony on the taste buds.

I discovered the recipe in Frances Mayes' admittedly hedonistic book about life in her Tuscan villa. I make it every time my friend Judy comes to visit from Maine. It's the kind of thing you need to eat with someone who also hears the music of the taste bud orchestra! Some people (you know who you are) refuse to try this dessert, saying it looks like pond scum. Their loss! More for us!

Depending on my mood and the state of the basil and mint plants, I sometimes greatly increase the amount of basil and mint. And sometimes I strain the blended herb liquid, but you don't need to.
__________________________________________
BASIL-MINT SORBET
Adapted from Under the Tuscan Sun by Frances Mayes

3/4 cup sugar
3 cups water
1 tablespoon lemon juice
1/2 cup mint leaves (or lots more)
1/2 cup basil leaves (or lots more)

Boil 1 cup water with the sugar for 5 minutes, stirring little if at all. Cool.

In blender, blend remaining two cups water with mint and basil leaves until thoroughly pureed. Add lemon juice and cooled sugar syrup, and chill well.

Freeze in ice cream freezer, or if you don't have one, use the ice-cube tray/repeated blendings method.

Serve in little bowls that you've put in the freezer for a while.

The sorbet is best made and frozen about 4 or 5 hours ahead of serving; long-term freezer storage hardens it.

Serves six or eight, depending on size of serving.

Monday, June 7, 2010

Olde English Seed Cake

For bedtime reading, the Miss Read books can't be beat. A deep calm comes over one upon opening one of her books at the end of the day. Quiet English villages in the Cotswolds ... cottage gardens, eccentric characters, and never a day without tea. When someone falls ill in Fairacre or Thrush Green, "lemon barley water" is produced, a restorative believed to help strengthen a weakened constitution. It's simply lemonade made with water in which barley has been cooked, sweetened with honey.

Seed cake is frequently offered at tea. In modern times, seed cake is merely a sponge cake with caraway or anise seeds added. It's still served at English teas. But its origins go back as far as the 1500's, when it was a yeasted, round cake. It's mentioned in Chaucer's Canterbury Tales, its round shape said to represent a medieval shield known as the Buckler.

Years ago my mom and I made a round skillet bread with caraway seed in it, called "San Francisco Firehouse Bread." That memory, plus the intrigue of making a recipe with a history going back to an age when books had titles like Book of Cookrye and The English Huswife, prompted me to do a little research and create this cake of seeded exquisiteness. Not something we often bake with, seeds bring a unique flavor as well as a gritty crunch.

Step back in time ...
__________________________________________
OLDE ENGLISH SEED CAKE
Adapted from this website

I used a mixture of seeds; you can use all of one type if you wish, or a different mixture than mine. Make sure any mixture you use is a pleasing one.

1 package yeast
1/8 cup warm ale or water

1/2 cup (1 stick) organic butter
2/3 cup organic sugar
1/8 teaspoon salt

2 fresh, local eggs
2 teaspoons anise seeds
2 teaspoons caraway seeds
1/2 teaspoon cardamom seeds

1-1/2 cups regular flour
1 cup whole wheat flour

About 1-1/2 cups milk (I used some fresh, local buttermilk from this adventure!)

Heat oven to 350 degrees.

Sprinkle yeast over ale or water in a small bowl.

Crush seeds lightly with a mortar and pestle if you have one.

In food processor, cream butter, sugar and salt until smooth. Add eggs, seeds, flours, yeast mixture, and 1 cup milk. Blend JUST until smooth. You should have a thick batter. If needed, add remaining 1/2 cup milk.

Pour batter into buttered 8-inch round cake pan. (I used a buttered 8-1/2 inch springform pan.) Bake 45 to 55 minutes or until toothpick inserted in center comes out clean. Cool on rack for about 15 minutes before running knife around sides and turning cake out onto a plate.

Makes 8 servings.

Tuesday, May 25, 2010

Lemon, Almond and Rosemary Cake


Crazy Water, Pickled Lemons is my go-to cookbook for lush, inspiring photographs and recipes. Whenever we have a lightning storm, I get out this cookbook ... because once I was reading it when a lightning storm with drenching rain struck, and somehow a full-circle connection was created between nature's majesty, me, and this book. It leans definitely to the Middle-Eastern, and ever since that last big storm we had a while back, I've been thinking about trying this cake. I used homemade sourdough bread that already had rosemary in it, organic lemons, organic sugar, and my luscious local eggs.

The author suggests serving it with berries, but my little patch of strawberries is just beginning to produce, so we augmented them with mango when it came time to partake. This cake has a wonderfully grainy texture, a sweet lemony tang, and an exotic, Middle-Eastern syrupy aspect, all infused with the woodsy essence of rosemary.

I know it's not health food, but it's soul food.
_________________________________________
LEMON, ALMOND AND ROSEMARY CAKE
Adapted from Crazy Water, Pickled Lemons by Diana Henry

For the cake:

2 ounces stale white bread (3/4 cup crumbs)
3-1/2 ounces (3/4 cup) blanched almonds (non-blanched work fine, too)
2 teaspoons rosemary leaves
3/4 cup sugar

Grated zest of 1 lemon
3/4 cup olive oil
4 local, free-range eggs

2 teaspoons baking powder

For the syrup:

Juice of 2 lemons
1/2 cup water
1/3 cup sugar
2 sprigs rosemary

Butter bottom and sides of an 8-1/2 inch springform pan. I think you could also use an 8-inch square Pyrex pan, or similar cake pan, if you butter it generously, flour it as well, and run a knife around the edge of the pan when releasing the baked cake.

In food processor, grind bread, almonds and rosemary as finely as possible. Add sugar, lemon zest, olive oil and eggs, and pulse as briefly as possible, just to blend. Add baking powder and pulse very briefly, just until until baking powder is incorporated.

Pour batter into prepared pan, put into a cold oven and turn oven on to 350 degrees. Bake for 45-50 minutes or until cake is brown and a toothpick inserted int he center comes out clean. Cool cake for 10 minutes, then turn it out onto a plate.

While cake is baking, make syrup. Combine all ingredients in a small saucepan and heat, stirring to dissolve sugar. Turn heat up and boil syrup for 5 minutes, then remove from heat. Leave rosemary in to infuse.

Pierce holes in the warm cake, and pour the syrup evenly over. Serve with berries, other fruit, yogurt, ice cream, or any other accompaniments that strike your fancy.

Makes 8 servings.

Tuesday, May 11, 2010

Coconut Quinoa Pudding with Rhubarb

Curious about using the new coconut beverage product for cooking, I decided to take the plunge and try this recipe using it. This is not coconut milk like you'd find in cans, but a beverage made for use like milk.

Quinoa is really quite a nutritious grain, high in protein, and tasty besides. This pudding is really easy to make, and you could of course use any fruit of the season.
________________________________________
COCONUT QUINOA PUDDING WITH RHUBARB
Adapted from this recipe

3-1/2 cups coconut beverage (I used vanilla; if you use unsweetened, you may need more sucanat)
1 cup quinoa, rinsed and drained
1 tablespoon sucanat
A pinch of salt

Fresh cooked rhubarb from the farmer's market

In medium-sized, sturdy saucepan, bring coconut milk to a simmer over medium heat. Add quinoa and sucanat, stir, and reduce heat to low. Simmer 20 to 30 minutes, stirring frequently as the quinoa absorbs the liquid. Add 1/2 cup coconut milk if needed to thin the pudding. When the pudding reaches the texture you desire, remove from heat and cool, or serve warm. It will thicken on standing and when you refrigerate it.

Layer however you please with the rhubarb, or just top a bowl of the pudding with the fruit.

Makes 4 generous servings or 6 stingy ones

Sunday, May 9, 2010

Strawberry and Rhubarb Trifle


Here again is a simple yet brilliant culinary tradition brought to us by the British. What could be a more perfect way to showcase fresh, seasonal fruits than to loosely combine them in a delightful muddle of sponge cake, custard and whipped cream? If you don't have a trifle dish, use another pretty dish, or make individual trifles in glasses or parfait dishes.

The variations on the basic trifle are endless, which merely reaffirms its status as a truly classic recipe. All of its components can be changed to suit what you have on hand. Use almost any fruits, or use jam. The cake can be chocolate or any other flavor, or use ladyfingers or other cookies. (Just don't use Twinkies, you hear?) The custard layer soaks into the cake, so you can use other sauces and puddings to your heart's content.

A lovely way to celebrate a Mom who is the cream of the crop, as mine truly is.
_________________________________________
STRAWBERRY AND RHUBARB TRIFLE

3 pints fresh strawberries, trimmed and either left whole or sliced

Some fresh rhubarb that you have washed, trimmed and cooked with a little water and sweetener of your choice (I used agave syrup)

1 recipe Creme Anglaise from Joy of Cooking, or any custard sauce recipe you like; you'll need about 2 cups.

1 8-inch square (or 13- x 9-inch) sponge cake (or any firm cake) from your favorite recipe, cooled and cut into approximately 1-inch cubes

1 cup lightly toasted sliced almonds

1 to 2 cups whipping cream, whipped and lightly sweetened if you wish

Spread a little rhubarb in the bottom of the trifle bowl. Top with half the cake cubes. Pour half of the Creme Anglaise evenly over the cubes. Arrange half the strawberries over that, and spread a generous layer of rhubarb over them. Sprinkle 1/2 cup of the almonds over the rhubarb. Add the remaining cake cubes, pour the rest of the Creme Anglaise over them, and arrange remaining strawberries on top. Cover and refrigerate until you are ready to serve, up to a few hours.

Spread whipped cream evenly over top of trifle and scatter remaining 1/2 cup almonds over. Serve onto plates or into bowls. I used a wedge-shaped flat pie server to cut vertically down into the trifle like a pie, and lifted out roughly wedge-shaped, gloppy servings. But a big spoon would work too.

This dish served 6 people, with almost universal second helpings, with about 4 servings left over. Remember that you can size this dish smaller quite easily!

Wednesday, March 31, 2010

Goat Cheese Chocolates

What is it about goat cheese? I'm not a big fan of soy, so goat cheese is kind of my tofu. But it has way more personality. It works and plays well with other flavors and textures, but I'd never really thought about goat cheese in desserts. But it works! And just think, you're getting your antioxidants (choc) and protein (cheese) in one delicious treat.

The original recipe had no sugar, probably because the calendar I got it from had healthy living as its theme. Unless you are a true lover of very dark, unsweetened chocolate, you'll want to add a bit of sugar, or use sweetened chocolate.

You can roll it up in little balls and coat it in cocoa to make truffles, or flatten it and cut it into squares.

Yes, this recipe uses no local ingredients. Yet. I am hoping for a local producer of goat cheese ... I know they're out there!
_________________________________________
GOAT CHEESE CHOCOLATES
Adapted from A Year of Healthy Living calendar, Amber Lotus Publishing

4 ounces excellent quality bittersweet chocolate, chopped
6 ounces fresh goat cheese
1 teaspoon pure vanilla extract
1/4 cup walnuts, toasted almonds or hazelnuts, chopped
1/4 cup unsweetened excellent quality dark cocoa powder

Melt chocolate over low heat, stirring often. When smooth, set aside while you proceed. In small bowl, beat goat cheese with vanilla (I just used a fork and lots of enthusiasm), then stir in chocolate and nuts.

Taste mixture at this point. If you like, add a little sugar. Gather into a ball, or press into a bar, wrap well in plastic wrap and refrigerate for an hour. Cut into squares, or for truffles, shape into balls and roll in cocoa powder. If making squares, you can refrigerate it longer and cut just before serving. Makes about 18 pieces.

Wednesday, January 6, 2010

Giant Fuji Apple Cookies

If you find yourself with some giant, local Fuji apples, this recipe is the best thing to do with them, bar none. With overuse of sugar and white flour being exposed as the culprit of many maladies, getting back to the basic "snack" is important, and made easier when you have fresh, local produce to use. For something so delicious, it's amazing that the health benefits of eating apples are extensive.

Back in the day, the "Apple Man" showed up every fall at our rural Pasco home. His old pickup bed was full of boxes of fresh apples. We'd get apples from friends and relatives, and local orchards, too, but I remember that Mom always bought some from the Apple Man.

Hence, when I was a little kid and my brother and I would ask for a "snack," more often than not Mom fixed us each a bowl of these. Thanks, Mom ... for a great start in appreciating fresh, local food!
_________________________________________________
GIANT FUJI APPLE COOKIES

Wash, core and slice a big 'ol fresh Fuji apple. Other varieties work just fine, too. If it's local, even better. Place slices appetizingly in a bowl. Find that great book you're reading, settle into a comfy chair, and enjoy your incredible snack, remembering to pause now and then to appreciate its juicy, fresh, crunchy deliciousness.

Tuesday, December 22, 2009

Pears in White Wine with Vanilla, Almonds & Chocolate


I confess to becoming more and more determined through my years of cooking to create recipes that are not only tasty but good for you, and that don't have artificial stuff in them (you know ... like "fat free sour cream." Honestly.) But to do so successfully has always been a tall order. My stepchildren are still incredulous that I actually made spinach cookies.

Hence, the CSA pears intrigued me. Pears are often poached in red wine, but why? And vanilla is often associated with them ... and almonds ...

Determined to avoid sugary, carmel-y sauces and butter and whatnot, I forged ahead and poached the pears in white wine with a bit of vanilla, and topped them with almonds and grated unsweetened chocolate. And I actually served these not only to my husband, but to my friend Holly, who had dinner with us tonight. She said they tasted like something you'd get in a fancy restaurant. But ... she IS a very nice person ...

To peel pears, it helps to have a serrated peeler. It works really well on thin-skinned fruits and vegetables.

I saved a couple of the whole pears because I am determined to come up with a dish that has pears AND onions in it.

_______________________________________________________________
PEARS IN WHITE WINE WITH VANILLA, ALMONDS & CHOCOLATE

Ripe pears
White wine
Vanilla
Almonds
Unsweetened chocolate

Peel, halve and core pears. Arrange in a skillet with a quarter inch or so of white wine. Add a teaspoon or so of vanilla. Cover and poach until pears are almost soft (don't overcook). Remove lid and continue to simmer until liquid is almost gone. Turn the pears to coat them in the reduction, then place on dessert plates and top with a mixture of chopped almonds and grated chocolate. Make sure the pears are hot so the chocolate melts.

Monday, December 14, 2009

Squash Custard with Cranberries, Walnuts & Ginger


You know how when you watched the movie Titanic, you found yourself thinking, "maybe it won't sink this time." Even though I knew better than to leave the big Hubbard-y CSA squash in the garage, I did it anyway, thinking somehow the laws of thermodynamics would alter themselves just this one time. But the temperature got so low that the squash froze. I asked my parents if it was okay to quickly cook squash that had frozen, but they weren't sure. I called the County Extension office, but no food people were around.

Sometimes, you just gotta do what seems right. So I hacked off the most frozen parts, cut the rind off the lesser-frozen parts, and microwaved the resulting cubes. Ice crystals in the squash turned into water, so I had to drain the cooked squash. The CSA acorn squash (which I had brought inside) was roasted halved. I was rewarded with a lovely yellow-gold squashy mash. Each squash had a distinct taste; the Hubbard-y one was mild and cool, and the acorn was intense and earthy. I decided to combine them for an ethereal custard.

I wanted to try molasses instead of sugar, but was interested in preserving the beautiful color ... this is SQUASH, not pumpkin, and its appearance should say so. The custard mix was kind of thick, so I tested a cranberry on top and it didn't sink, so I figured a little topping of nuts, ginger and cranberry would lift this into another realm.

Libby's, step aside. Squash just may be the new pumpkin.
___________________________________________
SQUASH CUSTARD WITH CRANBERRIES, WALNUTS & GINGER

2 1/2 cups cooked CSA squash
1/4 cup organic sugar or sucanat
1/4 cup agave syrup
3/4 teaspoon salt
1-1/2 teaspoons cinnamon
3/4 teaspoon ginger
1/4 teaspoon ground cloves
3 local eggs
1 cup organic milk
3/4 cup organic half-n-half

Topping:
2 tablespoons dried cranberries
2 tablespoons candied ginger
2 tablespoons local walnuts

In blender, combine custard ingredients until smooth. Pour into buttered, shallow 3-quart casserole.

In small food processor, chop ginger pieces until about the size of peas. Add cranberries and chop, then add walnuts and chop. The mixture pieces should be approximately the same size. Sprinkle over top of custard.

Bake at 350 degrees for about an hour and 15 minutes or until knife inserted in center comes out clean.